← All TWiT.tv Shows (Audio)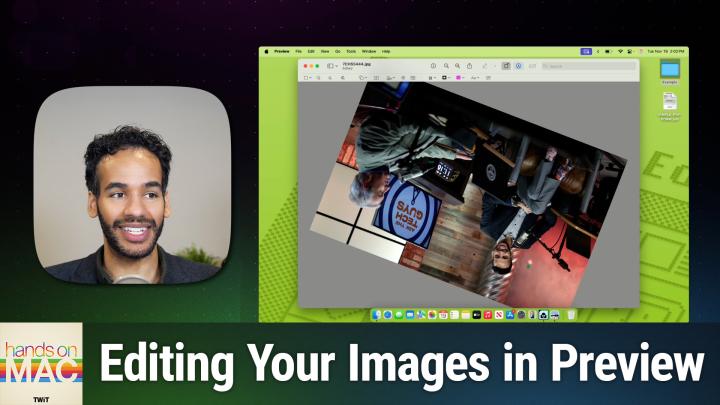
All TWiT.tv Shows (Audio)
Hands-On Mac 159: macOS Preview: Edit Images
00:21:10
Crop, Resize, Rotate, Annotate, & Adjust Images
Loading summary
Transcript31 lines
- [00:00]
Micah Sargent
Coming up on Hands on Mac, we continue our journey through preview, this time looking at editing images. Stay tuned.
- [00:08]
Bluehost Ad
Got great ideas but no idea how to build a website. Get bluehost with their AI design tool, you can quickly generate a high quality, fast loading WordPress site instantly. Once you've nailed the look, just hit enter and your site goes live. It's really that simple. And it doesn't matter whether you're a blogger, influencer or just starting your side hustle. Bluehost has you covered with built in marketing and e commerce tools to help you grow and scale your website for the long haul. And when you upgrade to Bluehost Cloud, you get 100% uptime and 24. 7 support to ensure your site stays online through heavy traffic. Bluehost really makes building your dream website easier than ever. So what's stopping you? You've already got the vision. Make it real. Visit bluehost.com right now and get started today.
- [00:56]
T-Mobile Ad
It's better over here.
- [00:58]
Micah Sargent
Now.
- [00:58]
T-Mobile Ad
At T Mobile get four 5G phones on us and four lines for $25 a line per month when you with eligible trade ins all on America's largest 5G network.
- [01:09]
Minimum of 4 lines for $25 per line per month with autopay discount using debit or bank account, $5 more per line without autopay plus taxes and fees and $10 device connection charge phones via 24 monthly bill credits for well qualified customers. Contact us before canceling entire account to continue build credits or credit stop and balance on a required finance agreement due bill credits end if you pay off devices early. CT mobile.com Joe grand had to hack.
- [01:28]
Eileen Ormsby
Open a crypto wallet with a lost password and millions of dollars trapped inside.
- [01:34]
Micah Sargent
I mean, I'm an equal opportunity hacker.
- [01:36]
Jordan
Eileen Ormsby had to figure out if this Internet hitman that was threatening her was the real deal. They started tracking me down and sending.
- [01:44]
Micah Sargent
Me emails saying stop saying that we're a scam.
- [01:47]
T-Mobile Ad
We're the real thing.
- [01:47]
Eileen Ormsby
Merrill Goldberg had to encrypt secrets into sheet music to smuggle them across the Soviet border during the Cold War.
- [01:56]
Bluehost Ad
And then we were brought into a.
- [01:57]
Micah Sargent
Back room and had our first heavy duty interrogation.
- [02:02]
Jordan
And what did we get to do, Jordan?
- [02:04]
Eileen Ormsby
What'd we get to do?
- [02:05]
Jordan
We got to talk about it.
- [02:06]
Eileen Ormsby
That's because Hacked is a tech show about cybersecurity. Internet grifters, people using tech to do weird, unexpected stuff.
- [02:14]
Jordan
Sometimes we focus on one big story.
- [02:17]
Eileen Ormsby
Sometimes we talk about a bunch of little stories. Find hacked wherever you get your shows.
- [02:21]
Jordan
That's Hacked a show about all the weird stuff people do with technology. Wherever you get your shows.
- [02:29]
Micah Sargent
Podcasts you.
- [02:31]
Chris Gethard
Love from people you trust.
- [02:34]
Micah Sargent
This is Twit. Welcome back to Hands On Mac. I am Micah Sargent and today we are taking a look at how to edit images in macOS using Pre. So we have been going through the entirety, right, of the Preview application and looked at how you can edit PDFs and work with file types and do a whole bunch of stuff, right? Preview is a jam packed application that can really make all the difference when it comes to working with those basic files. So one more area that we have to look at is images. We kick things off by talking about how to convert images to different formats. This time we're looking at the editing tools within Preview that lets you do quite a bit without needing to jump into extra stuff. So let's head over to macOS Sequoia and take a look. All right, here we are in macOS Sequoia and as we usually do, we are going to work with our example folder that we have on the desktop here. In the example folder we've got several different images, a jpeg, an HEIC image, another jpeg, a png. And I'm actually going to sort by kind to kind of get the images together here. And the first thing that we're going to do is just open this jpeg. This is a JPEG of Leo and myself on the Ask the Tech Guys set. And we're going to start by looking at how to crop, resize and rotate an image. So the first thing that we can do to crop, resize or rotate the image is click on the Markup toolbar in or the markup button for the Markup toolbar in the the top of the Preview toolbar. Here we are presented with several options, one of which is the selection tool. If we click on the selection tool, this lets us what, select parts of the image. So what we can do is click and drag to select a part of the image. And from here we then have the option to crop the image. The way that we choose to crop it is by going into that toolbar and selecting Crop to Selection at the end of the toolbar. Now, there are some different ways that you can do this. So you can choose to make changes to it based on your own. Because here's an example. So if I click somewhere I can see, if I click and hold, I can see the size, the dimensions of my selection. And right now I've got kind of a free moving selection bar, right? And so I'M taking it and I'm moving it around, and the selection is whatever I want it to be. But if I click and hold on the shift button on my keyboard while I drag, now, suddenly it makes it so that the selection is a square. So if you want to quickly make a square selection that can then become a square crop, then you want to hold down that shift key. So by choosing a selection on the in the image and then clicking Crop, it will crop it to that smaller size at any time. You can undo it by holding down command and pressing Z on the keyboard, or going up to edit and choosing Undo Crop. And because you will have just cropped something, it will actually say undo crop as opposed to just saying undo. So you'll have that kind of specific change there. That's how you crop an image. By the way, there is a keyboard shortcut for cropping as well. It's command and K, K for crop, not C for Crop. So if you want to, you can use that selection tool, hold down command and press K instead of having to go back up in and click on it in the keyboard. Now, the next thing that you can do is change the image dimensions. So to do this, you simply click on the markup toolbar again in the top. The markup. It's the markup button. To reveal the markup toolbar, you click on that button and then you move down into the markup toolbar itself and you head to the last option in the second set of toolbar options. It's called Adjust Size. If we click on that, we have a bunch of different options here. We can choose to fit it into a custom pixel, and that means it uses the dimensions of the original image to determine the image dimensions. You can say, I want it to fit to 320 by 320 pixels. I wanted to fit to 640 by 640, 800 by 8001024 by 1024, 1280 by 1280. What that does is it scales the image dimensions down such that no side of the image is larger than 1280 by 1280. So it's not going to make the image a square. That is 1280 by 1280. It fits it into that shape. But we would want to maybe make some adjustments other than that. So I'm going to cancel and we're going to go back into the adjustment size again. And now we've got it set to custom. Right now, the image is 41.33 by 27.56 inches in width and height. I'M going to change that to pixels so we can work with that. We can see our resolution. And we have the option to scale proportionally and resample the image. What scale proportionally does is it keeps that original proportion of the image. So if I change the width, the height is going to change according to how I've changed the width so that it keeps that aspect ratio. But you have the option to edit these independently. So if I unselect scale proportionally, you'll see the little keypad next to the width and height go away. Because in that case, we're removing the aspect ratio lock. Now, I could, if I wanted to do something funny like setting the width to 1000 and the height to 1000. Clicking OK. And it makes that image a square. That, of course, kind of throws things off. I'm going to hold down CMD press Z to change it back to its original size. We'll click on that markup toolbar again and we'll go into adjust size. And just quickly we'll talk about these other options, which of course let you change the resolution of the image. It's currently in pixels per inch. You can change it to pixels per centimeter, and you can also choose whether or not to resample the image. Now, that resampling is something that is a little bit more for kind of a graphic designer, somebody who has an understanding of how these tools work when it comes to resizing them. But for the most part, you want to keep that selected. There are times where by changing the size of the image and having resample image selected, it may make the image look a little weird. So you can kind of toggle that off and see if it does, if it looks better to you without that turned on. What's great about it is that you also get at the bottom a readout of the resulting size of the image. It shows you the percentage change, whether it gets larger or smaller. And most importantly, it shows you the size of the image and the size of the file rather. So this is a common thing where I will be signing up for an online account and that account says, upload a profile photo. And I go to upload a profile photo and the image that I have is far too large in file size. Popping it open in preview really quick, changing the size of the image to maybe instead of 2976, I do 2000. Suddenly the image that was once 846 kilobytes is now 495. And so you can easily see how much of a change that made and make it to whatever size that you need. So I'm going to click Cancel because we don't want to adjust the size of this image in that case. But that is how you crop and resize an image. The last thing that I want to mention here is that you can rotate an image. So if the image is too large or rather is not positioned how you want it, then simply clicking on the Rotate option, which is its own little toolbar option, is available to you. In the toolbar, you can simply click to rotate the image to the left and continue to click to rotate the image and then you are able to get it to how you want it. Now that's one way to go about it. You can also at any time head up to the Tools option in the menu bar and choose Rotate left and Rotate right. But there are also options to flip horizontal and flip vertical. Perhaps you have an image that is rotated in a way that you don't expect and it is, it's not looking how you would you would want it to. It could be that that image needs to be flipped. So you can choose to flip horizontal. Now I'm a P appearing on the right side of LEO instead of the left side of LEO and flip vertical, which is going to put the pixels at the bottom at the top and the pixels at the top at the bottom. Obviously we don't want to do that, so we'll leave this image alone. But if you ever have an image that seems mirrored oddly, that can be something that will make a change for you. So those are available in the tools bar and there are keyboard shortcuts for rotating the image to the left and the right which are easy to remember. It's command L to go left, command R to go right. So pretty easy to do there.
- [12:47]
Bluehost Ad
Got great ideas but no idea how to build a website. Get bluehost. With their AI design tool, you can quickly generate a high quality, fast loading WordPress site instantly. Once you've nailed the look, just hit enter and your site goes live. It's really that simple. And it doesn't matter whether you're a blogger, influencer or just starting your side hustle. Bluehost has you covered with built in marketing and e commerce tools to help you grow and scale your website for the long haul. And when you upgrade to Bluehost Cloud, you get 100% uptime and 24. 7 support to ensure your site stays online through heavy traffic. Bluehost really makes building your dream website easier than ever. So what's stopping you? You've already got the vision. Make it real. Visit bluehost.com right now and get started today.
- [13:37]
T-Mobile Ad
After investing billions to light up our network, T Mobile is America's largest 5G network. Plus right now you can switch keep your phone and we'll pay it off up to $800. See how you can save on every plan vs Verizon and at&t@t mobile.com Keep.
- [13:53]
And switch up to four lines via virtual prepaid card. Allow 15 days qualifying unlocked device credit service ported 90 plus days with device ineligible carrier and timely redemption required. Card has no cash access and expires in six months.
- [14:06]
Micah Sargent
Now there are times where you will have an image that has a pretty, pretty normal white or gray background, sort of like a clip art piece. But it's maybe it's in JPEG format or there's. Or it's a png. It's, it's something that offers transparency but you want that transparency gone. You are able to remove the background from an image very easily and there are a few options for how to do this. So we can go up into the toolbar again and choose Show Markup toolbar and we can choose our selection tool and this time because it's macOS Sequoia, we have a fourth option here called Smart Lasso. Smart Lasso allows us to trace around something in the image which in this case, let's say I want this microphone here. So I'm going to start to draw around the outside of the microphone and slowly but surely kind of trace that shape and you don't have to be perfect about this. That's the good thing about it. It's a smart lasso. So it starts to figure out what you are after based on the kind of the cont contrast in the image and then it will make a selection. Now, it's not always going to get it right and that is where you would need a more powerful tool. In this case, it didn't do a great job of getting it. So I'm going to choose Command Z to kind of deselect that and undo it. And we're going to try selecting this dog which has a better background here. And this time I'm going to be a little bit more sloppy and say okay, I want this dog. And we'll go around its paws like so and around its little haunches here and around its ears and back. And once again, not a great selection. So depending on the type of image, Smart Lasso may work better or worse for you. It all depends on how well the foreground and the background kind of contrast with the image. There's an easier way when it comes to removing the background of an image that has a very, very contrasted background, and that is by using the Remove Background tool, which is called Instant Alpha. So with Instant Alpha, what you're doing is you are actually selecting the part of the image that you want to remove. And by. So when you click and hold, it starts to select essentially a color. And as you, you have to keep the cursor held down, as you start to drag it out, it's going to select more of that color from the background and you can continue to move along, selecting different parts of the image that have this background. And the parts that are selected will turn red. And so I'm kind of going through slowly but surely, I'm upping the amount that I'm selecting to add to this selection here. And what you can do is quickly get a selection that has most of that background actually highlighted, and then you can delete that portion of the image. So if you imagine you're working with something that has a nice white background, and it's just say, like a pencil on a surface on a white background, you can click and drag out from that point to select more of the white, including the parts of the sort of shadow that are around the pencil, for example, and then it will leave everything highlighted except for the pencil. And then you can hit delete. It will remove that background and give you a nice transparent image. So it's very easy to do that to take out a background from the image. That is how you make adjustments to the kind of background of an image and extract an image. The last thing I want to talk about is a little bit more about the annotation tools, particularly when it comes to images you do have. So we will go up into toolbar one more time and choose to show the Markup toolbar. And there's one section here that I want to mention, which is the Adjust Color section. So we've talked in the past about these other annotation tools which are available to both images and PDFs. You've seen how you can add. You can add arrows, you can add a loop which shows portions of the text. But with an image, you actually have some pretty powerful image editing tools, including adjusting the levels of an image so we can drag the highlights, the midtones and the shadows. You're actually seeing the separation of RGB so the red, green and blue values and where they exist across the spectrum. And you can shove your colors darker or lighter. But there's also an Auto Levels tool which will go ahead and I'm going to click Reset all at the bottom, which will go ahead and adjust the image based on algorithmically, what it thinks would look best. So you'll see that it brought in the shadows just a hair and left everything else alone. From there you have the option to change the exposure of the image. And so you can see it's dragging all of those colors away from the highlights or it's dragging them away from the shadows. You can adjust the contrast of the image so we can kind of squeeze in with the colors, the red, green and blue values. You can adjust the highlights of the image so that it's either brighter or darker from the highlights. And of course the shadows which you can bring up or down to shift those values around, pulling some of those shadows up and making them a little bit brighter or dragging them down to make it a little bit darker. Also making adjustments to the saturation. So taking out some of the color, bringing up some of the color, the temperature of the image, which of course can make the image feel cooler or warmer. The tint of the image, which is like a white balance option. You can change the tint automatic or rather manually, or you can use the image selection tool to adjust the tint based on a gray or white area in the photo, AKA white balance. So it's left alone by now. But if I click on the little eyedropper tool, I can pick a, as they say, neutral gray or white point in the image and we'll find this neutral gray in the background. And then it will make adjustments to the tint based on that. And there you can see that it shifted the temperature and the tint values based on our selection. And then last but not least is the sepia tool, which can make the image more sepia toned or less sepia toned in the color section. But the last and final tool is making adjustments to the sharpness so you can kind of blur the image or make it much sharper, which gives it that kind of HD effect. With just a few adjustments here with the levels tool, I was able to change the look and feel of this image. Now we've got this much sharper, more realistic looking image that was absolutely generated by AI and we could have had a little bit of sepia tone to it, just to give it a nice vintage feel. But we'll leave that alone for now. The image adjustment tools within Preview are actually quite powerful, so there's not necessarily a reason to hop into photos or a third party tool if all you want to do is make some quick adjustments to the look and feel of the image before you use it for something and then I simply just need to hold down command and press S to save that image in its new format. And now we have an edited image again. The other tools that are available here are things that I've shown you before when We've talked about PDFs and they are more for the PDF tools, but the Smart Lasso and the Instant Alpha which is also known as Background Extraction tools are new as well as some of the cropping features that are available in Preview. Dear friends, that is going to bring us to the end of this episode of Hands On Mac. I do believe that that also brings us to the end of our look at the Preview app. Preview is an incredibly powerful application that is built into every modern Mac and many non modern Macs, but perhaps going very far back here, not going to have that. But Preview is a tool that I think everybody should use. In fact, I got an email from one listener who said I didn't realize that it could do all of this. I'm going to start using Preview as my means of editing PDFs because I don't need a tool to do more than what Preview is able to do and that's what I aim to do here on Hands On Mac. So thank you so much for tuning in to the show. Thank you to those of you who are members of Club Twit. If you aren't a member right now, we're offering two weeks for free. Absolutely free. So consider joining the Club Twit TV Club Twit to check it out for two weeks. Those of you who are members can also get many months of Club Twit for free Credit toward your future payments by referring a friend. TWiT TV ClubTWiT referral will give you more information about that. So thank you for tuning in. I'll catch you again for another episode of Hands On Mac. Bye bye.
- [24:48]
T-Mobile Ad
It's better over here at and T customers switching to T Mobile has never been easier. We'll pay off your existing phone and give you a new one free. All on America's largest 5G network. Visit t mobile.com carrierfreedom to switch today.
- [25:05]
Pay off up to $650 via virtual prepaid MasterCard in 15 days. Free phone up to $830 via 24 monthly bill credits plus tax qualified port and trade and service on go 5G next and credit required. Contact us before canceling entire account to continue Bill credits or credit stop and balance and required finance agreement is due.
- [25:19]
Chris Gethard
Hi, I'm Chris Gethard, and I'm very excited to tell you about Beautiful Anonymous, a podcast where I talk to random people on the phone. I tweet out a phone number. Thousands of people try to call. Talk to one of them. They stay anonymous. I can't hang up. That's all the rules. I never know what's going to happen. We get serious ones. I've talked with meth dealers on their way to prison. I've talked to people, people who survived mass shootings. Crazy funny ones. I talked to a guy with a goose laugh, somebody who dresses up as a pirate on the weekend. I never know what's going to happen. It's a great show. Subscribe today. Beautiful Anonymous.