← All TWiT.tv Shows (Audio)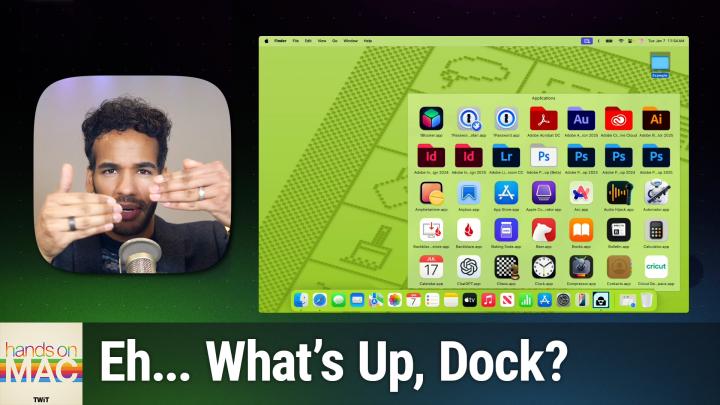
All TWiT.tv Shows (Audio)
Hands-On Mac 164: Using the Dock on macOS Sequoia
00:13:16
Discover Advanced Dock Settings and Features
Loading summary
Transcript7 lines
- [00:00]
A
Coming up on Hands On Mac, let's take a look at using the dock. Stay tuned. Podcasts you love from people you trust. This is Twit. Welcome back to Hands On Mac. I am Micah Sargent and today we are taking a look at using the dock on macOS Sequoia. Yes, I know many of you know how to use the dock, but there's a lot that you can do with the dock that you may not know about. And even if you know about the different features that are available as part of the dock, you may not know about how you can access those features in many different ways. So that's what we are going to look at first and foremost. Let's head over to macOS Sequoia and take a peek at our desktop here. So obviously you know that you can click on something in the dock and it will launch that app easy. But you can also do things like use one of the items in the dock to open a file. So, for example, if I had an image that I wanted to open and I wanted to see how it would look in a web browser, I can click and drag and drop that image on Safari and it will pop up that image in my browser. I can also, if I'm trying to find where something that I have in the dock is actually located, I can hold down the Command button and click on that item. So Notes, for example, and see where it is stored in the Finder, where it is on my Mac in this case, of course, in the Applications folder, I'm also able to switch between one app and another using some keyboard commands. Option click will actually let me switch to the previous app that I was using. So let's say I have Finder open and I have Notes open and I want to move back to my Finder screen. If I hold down Option and I click on Notes, then it pops me back to the Finder. But now let me open up Safari. Now I'm on Safari. If I hold down the option key and click on Safari, it pops me to Notes and downsizes all of the other apps. Sometimes you might feel like the apps are taking up a lot of space and you really want to have a more focused view of your screen. So I only want to work with Safari, even though I have the App Store and Settings and the Calendar all open. If I option and Command on my keyboard, hold those down and then click on Safari, it hides all of the apps except for Safari, keeping that one up. Now, there are other things that you can do. If you right click on an icon that is in the dock you will see different options available to you. These are the shortcuts options, not to be confused with Siri Shortcuts, but instead is a shortcut to open these items. And of course you know that if you right click on an item to show that shortcuts menu, you can hold down the option key to get Force Quit to appear which gives you the ability to immediately Force quit that app, which lets you get rid of an app that might be causing issues might be not working properly. Instead of having to go up to the Apple menu and choose Force Quit from there or use the keyboard shortcut alt command and the the escape key there instead. Being able to do that without using those keys is really nice.
- [03:51]
B
If you love your phone but not your carrier, just switch to T Mobile. You can keep your phone, keep your number and we'll help pay it off up to $800 per line. You can also use our savings calculator to compare our plans and streaming benefits against Verizon and AT&T. So switch and keep your phone, keep your number and keep more of your moolah. @t mobile.com up to four lines via.
- [04:12]
C
Virtual prepaid card allow 15 days qualifying unlock device credit service ported 90 plus days with device into eligible carrier and timely redemption required card has no cash.
- [04:19]
D
Access and Expires 6 months I'm no tech genius, but I know if I want my business to crush it, I need a website. Now. Thankfully, Bluehost makes it easy. I customized, optimized and monetized everything exactly how I wanted with AI. Within minutes my site was up. I couldn't believe it. Plus Bluehost keeps me protected 24. 7. No more worrying about hackers. I just relax and focus on my customers. So whatever your hustle may be, secure your online presence in 2025 with Bluehost. Head to bluehost.com to start now.
- [04:56]
A
Now, along with that, of course you can easily remove or add items to the dock and of course rearrange items. So if for example, there was an app that you regularly use, let's go into Finder and check our applications. Let's say I regularly use numbers. I can of course click and drag that item to the dock. And what I want to do is wait for a space to appear between two apps. Otherwise it's going to think you're clicking and dragging and trying to launch that item from another app. So here we can click and drag. Now of note, when it comes to apps, those go to the left of this little separator here. If It's a folder. It goes to the right of this separator here. So I've clicked and dragged numbers. Now, let's say there's an app that I rarely use or that I rarely launch from the actual dock. I can click and hold and then drag away. And we need to do it a little bit quicker than that until I see a remove icon appear above it. At which point when I let go, it removes that app from the dock. I can also right click on an option on an item and choose Remove from Dock to make it appear. And if there's ever an app that I want to bring back to the dock, I can, of course, click and drag it there. But another way to do that is to open up the app, right click on it, choose Options, and then choose Keep in Dock. Now, if I quit reminders Command Q, that app stays in the dock, and I could bring it back over to where it was before. So moving around and arranging items is very easy to do if you need to. And if you are looking to kind of customize the dock, well, you are able to do that. That very easily by going into the Settings menu. And so we choose System Settings, and we choose Desktop and Dock. And we can make changes to the size of the dock. So how large does it get? We can also change the magnification, meaning that when we scroll over, we'll choose small. Here it. Well, we need to make it a little bit bigger. It will increase the size of the app icon. So if you have that turned on where it's positioned on the screen, you can have it on the bottom, you can have it on the left, you can have it on the right, and then how objects are minimized. So right now is the genie effect, where the bottom of the app kind of squeezes down as if it's a genie coming out of a bottle or going into a bottle, or just the scale effect, which just scales up or down that item. So depending on what you like, you can have one or the other. What happens when you double click a window title bar, which arguably is not part of the dock, but you know, and then minimizing a window into the application icon. So I have that turned off. That means that if I have a Safari window open and I downsize it or minimize it, it goes to the right of that separator. If I have this turned on, then what happens is instead it will minimize into the Safari icon itself. And that is, of course, available to be used across all of the apps, automatically hiding and showing the dock. So you can make the dock go away until you move your cursor to the edge of the screen, at which point the dock will pop up. Animate opening applications. So whenever you first launch an app, does it actually animate as it opens? Show indicators for open applications. That's the little dot below on the dock that shows that that application is open. And then whether or not you show suggested and recent apps in the dock, which appears in its own little section, you'll notice there are two separators. Now, if I have that turned on versus turned off, I typically have that feature turned off by default. I don't want to see that. It just takes up space on the dock. Now, as I said, that's one way of doing it. But the other way of doing it is to simply move your mouse down to that separator area. And if I right click in that area, I am able to access all of these features. Turn hiding on and off. Turn magnification on and off. I can change whether it appears on the left side of the screen, the right side of the screen, or the bottom of the screen. I am a write dock person, but you can put it wherever you want, like the bottom. And then also those minimize using options genie or scale, plus access to all of the dock settings. But here's what's cool. If I click on this separator and drag it, I can also change the size of the dock very easily. So clicking and dragging up and down changes the size of the dock on my screen. And that is all from accessing that separator. Now, there is a really cool feature that is part of kind of what you can do with a dock, and that is the ability to use folders in the dock on your Mac. So I've got Safari here and I'm going to close out of that for now so that we can look at what it's like to have a folder in the dock. Now, this could be any folder. So in fact, what I'm going to do is go to Finder and come over here to Applications and I am just going to drag applications down to my dock. Now I can easily access all of my applications from my dock and see what applications are installed. I have some options for this. If I right click on it or Control click, I can sort them by name. So that's alphabetical by the date they were added, by the date they were modified, the date they were created, or the kind. Obviously with this application you probably don't want to choose kind because they're going to be apps for the most part. And then I can choose to display it as a folder or a stack. A stack means that in the app in the doc, it's going to show you kind of visually some of the things that are in that folder. Or you can choose Folder, in which case it's going to show it as a folder. So stack kind of gives you a little bit of layers to show you what all might be in the folder that you've added. Folder itself is just a folder icon and then you get to choose how the content is displayed. A fan, which will show you several apps at once. Let's see, 1, 2, 3, 4, 5, 6, 7, 8, 9 apps. And then if you want to access more, you need to actually click. You can't scroll with this, so I don't recommend it for a folders that have a lot of content in it. Unless it's like your downloads folder, where you have it sorted by date modified or date added, in which case it's only going to show you the seven or what was it, nine most recent ones, which is what you would want. In that case Grid, which of course will display the grid. That was the default option. This does allow for scrolling. And then you can imagine what list will show you, which in this case is a list of the applications. Also not great for a very long list of options. You can sort these all just as you'd like. And then last but not least is automatic, where it chooses the best one based on what items are in the folder and how many items there are. So it says, yeah, you probably want to do this as a grid and that will display those there. Then the last option is to choose to remove it from the dock or show it in the finder, which of course we've already talked about how you can show it in the finder simply with the keyboard shortcut. Or if you want to remove it from the dock, you can click to drag it up and let it go to also remove it from the dock. Of note, the Open Applications option is the same as the show and Finder option here. So in this case I'll click out of this and I just want to show you that you can also take another folder and drop it right beside this one I have as a stack. I believe this is also set to automatic. Yes. And so in that case it. It also feels that grid is the best way to display these items. And then you have your dock set up exactly as you want it to. Now, many of us power users of course, end up using the Using Spotlight or using some other means of launching apps and don't quite use the dock all that much. So it may change whether you have it display on screen at all times or where you have it placed, or if you have stacks. I'm personally personally not a big fan of using folders in the dock because I don't like accessing files from my dock or really even apps all that more all that often from my dock. But those are options for you if you'd like. And by default if you install a new version of macOS, you will see the Downloads folder displayed as a stack in your dock. That is going to bring us to the end of this episode of Hands On Mac, a look at using the dock on Mac and the different ways that you can make changes to how it displays and works on your Mac. Thanks so much for tuning in and I will catch you again next week for another episode of Hands On Mac. Bye bye.
- [14:21]
B
If you have a locked AT&T phone, we're here with bolt cutters. T Mobile will help pay off your locked phone and give you a new 5G phone for free, all on America's largest 5G network. Visit t mobile.com carrierfreedom via virtual prepaid.
- [14:36]
C
MasterCard in 15 days. Free phone up to $830 via 24 monthly bill credits plus tax and a $10 device connection charge. Qualifying port and trade in service on Go5G next and credit required. Contact us before canceling entire account to continue bill credits or credit stop and balance on required finance agreements, due bill credits and if you pay off devices early.