← All TWiT.tv Shows (Audio)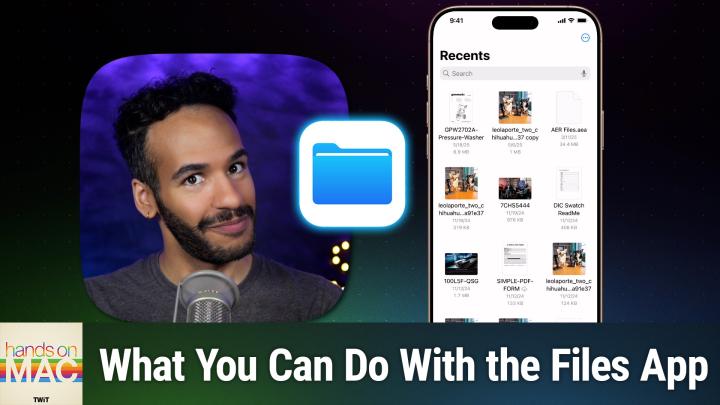
All TWiT.tv Shows (Audio)
Hands-On Mac 184: Files App Walkthrough
00:19:44
Browsing, scanning, sharing, & more
Loading summary
Transcript10 lines
- [00:00]
Micah Sargent
Coming up on Hands on Mac, let's take a look at the files app for iOS and iPados. Stay tuned.
- [00:06]
Odoo Advertiser
Imagine you're a business owner relying on a dozen different software programs, each one disconnected, more expensive and more complicated than the last. It can be incredibly stressful right now. Picture Odoo Odoo brings all the tools your business needs into one simple CRM accounting, inventory, manufacturing, marketing, HR and more. All seamlessly connected. Everything works together, giving you the peace of mind that your business is running smoothly from every angle. Odoo's open source applications are user friendly and designed to scale with your business, saving you time and money. Say goodbye to juggling multiple platforms and hello to efficient integrated management. Stop wasting resources on complicated systems and make the switch to odoo. Today, visit odoo.com o d o o.com and discover how Odoo can simplify and streamline your business operations. O Modern management made simple.
- [01:06]
Bluehost Advertiser
I'm no tech genius, but I knew if I wanted my business to crush it, I needed a website. Now, thankfully, bluehost made it easy. I customized, optimized and monetized everything exactly how I wanted with AI. In minutes, my site was up. I couldn't believe it. The search engine tools even helped me get more site visitors. Whatever your passion project is, you can set it up with Bluehost with their 30 day money back guarantee. What do you got to lose? Head to bluehost.com, that's B L U E H O S T.com to start now. Does it ever feel like you're a marketing professional just speaking into the void? Well, with LinkedIn ads you can know you're reaching the right decision makers. You can even target buyers by job title industry company seniority skills. Wait, did I say job title yet? Get started today and see how you can avoid the void and reach the right buyers with LinkedIn ads. We'll even give you a $100 credit on your next campaign. Get started at LinkedIn.com results, terms and conditions apply.
- [02:09]
Micah Sargent
Podcasts you love from people you trust. This is Twit. Hello and welcome to Hands on Mac. I'm Micah Sargent and today I want to talk about a powerful application that's a finder on Mac os, but for your iPhone and your iPad. You may have heard about the Files app. Maybe you've even opened something within the Files app. But I want to give you an understanding of what is possible with the Files app on these devices. So here we are on iOS and I should note that you can also access this app from your iPad as well on iPadOS, but let's take a look at things from here. So first and foremost, we will launch the Files app by looking for it, by swiping down to look for it. And you will probably see the Recents page when you first open it up. At the bottom of the screen you'll find Recents, which shows you the recent files that you've interacted with the Shared option, which shows you stuff that you've shared with other people. And of note, if you create a family folder, then people who are family members will be able to access that folder if you have an Apple family. And then last but not least is Browse, which lets you actually look through your documents. And by default when you choose the Browse tab, it's going to show you the icloud Drive section. Now let's go back to recents because you're probably knowing that if you've tuned in before my I can't help but be drawn to the top right corner because it's my favorite button. The More button. If we tap on the three dots in the top right corner, you'll see some options here. Select is first. Select lets you choose multiple files. You'll see a circle appear over each of those file icons, giving you the ability to select multiple files at once that you can interact with. It'll show you a count up at the top you can choose to select all, and it also pops up four squares in the top right corner as well. This lets you switch how these icons are being viewed as icons or instead as a list. You can also change how it's sorted by name, by kind, by date, by size, by tags. And there are also View options which lets you choose how they're sorted by default. If they're grouped in a certain way, like by kind for example, if they are, whether you go with an icon and a list size as the default, which is kind of larger or compact, which makes them smaller and then if you will show all file name extensions. So seeing at the end what type of file it is. Now again selecting Multiple is going to let you at the bottom use the share sheet, move them into a folder, delete them, or hitting the More button down here lets you copy these items, add tags to them, lets you choose to keep them downloaded or remove the download and we'll talk about but I'm going to go ahead and tap done and immediately you'll notice that that takes away the four squares if we tap that More button again. Our next option is Scan Documents and then Connect to Server. We'll take a look at Connect to Server in a minute and Scan Documents as well because I want to move down to the rest of the list, which is a little bit more of what we saw with those four squares. We can choose to display these items as icons, as a list, and then also sort them based on name, kind, date, size, tags, et cetera. Let's take a look at what Scan Documents does before we move on. If I tap on Scan Documents, it pulls open the built in scanning functionality for your iPhone or your iPad. So I have a document here. It's a manual from Ring and if I hold over the top, it's going to automatically scan that page and then I can have it scan the next page. Doing this here with one hand is a little difficult, but I think we can pull it off. Let's see here. And we're just going to go with it being a two page document. Now you'll see. Whoops. Okay, that's kind of tough. But if you're watching this as opposed to listening to it, you will see. But even if you are trying this just from the audio, you'll see a blue rectangle appear over the file and that is showing you the actual detection of the edges of this document. Now that is because I have auto selected in the top right corner. You can also choose Manual which will let you snap the photo to actually gather that image as a scan. We can set up filters so whether it's color, grayscale, black and white, or a full on photo. And we can change whether the flash is on or off. Let's say this was a two page document. I can quickly look at the two parts of it that I've seen thus far. I'll tap on Done and choose Save in the bottom right hand corner. And then it says okay, great. Where do you want to save it? I'm going to choose Documents and I'm going to call it Ring Manual because that is what it is. And choose Save. And now it automatically creates a PDF for me of this document. So I was able to capture that very easily. That is what the Scan Document functionality does in the top right corner. Now again, in shared, if I were to take a folder and share it with other people, those would show up here and we'll take a look at that in a moment. Lastly, browse now in the Browse tab. By default it's going to show you your icloud drive. In it, you are likely to find desktop documents downloads because those are equivalent to the desktop documents and downloads folders on your Mac. But then also you will see folders with app icons on them. Those are the app icons for apps on your phone, your iPad, your Mac that actually store their files in these special folders. So if I choose Keynote, we've created two presentations in the past. Whenever I've done Hands on Mac, those will show up here. So you're always able to access them. And in fact, if you are in Keynote and you go to open a document, it's coming from this folder if it's saved online. What I want to point you to though is in the top left corner of this icloud drive page there's a browse option and we'll take a look.
- [08:46]
Robinhood Advertiser
At that next Trading shouldn't have Barriers When Robinhood started, it was built to make trading more accessible. Now Robinhood offers more sophisticated trading tools. Experience the future of trading on Robinhood Legend, the all new desktop platform that harnesses intuitive design to deliver a seamless experience for traders. Free to use with a Robinhood account, Robinhood Legend is designed for how you trade with powerful charts including custom intervals down to the tick and over 80 indicators and drawing tools. Trade all your favorite assets, including popular stocks and ETFs all in one place. Take your trading to the next level by customizing your layout in seconds and even enter and exit positions in one tap right from the chart. With up to 8 charts per layout, the future of trading is fast, powerful and precise. Experience it now on Robinhood Legend Sign up today. Investing is risky. Robinhood Financial LLC Member SIPC is a registered broker dealer. Other fees may apply.
- [09:46]
Ryan Reynolds
So when I ask what is Odoo, what comes to mind? Well, Odoo is a bit of everything. Odoo is a suite of business management software that some people say is like fertilizer because of the way it promotes growth. But you know, some people also say Odoo is like a magic beanstalk because it grows with your company and is also magically affordable. But then again, you could look at Odoo in terms of how its individual software programs are a lot like building blocks. I mean, whatever your business needs, manufacturing, accounting, HR programs, you can build a custom software suite that's perfect for your company. So what is Odoo? Well, I guess Odoo is a bit of everything. Odoo is a fertilizer. Magic beanstalk building blocks for business. Yeah, that's it. Which means that Odoo is exactly what every business needs. Learn more and sign up now@odoo.com that's O-O-O.com Ryan Reynolds here from Mint Mobile.
- [10:47]
Bluehost Advertiser
I don't know if you knew this, but anyone can get the same Premium.
- [10:51]
Micah Sargent
Wireless for $15 a month plan that I've been enjoying. It's not just for celebrities. So do like I did and have.
- [10:57]
Bluehost Advertiser
One of your assistant's assistants switch you to Mint Mobile today. I'm told it's super easy to do@mintmobile.com.
- [11:03]
Micah Sargent
Switch upfront payment of $45 for 3 month plan equivalent to $15 per month required intro rate first 3 months only, then full price plan options available, taxes and fees extra. See full terms@mintmobile.com so with the Browse option, if we tap on that, it actually takes us out and back to a main page here that has locations, favorites and tags. We can add tags to documents based on, you know, maybe you set up your own color coding system where red means that the document needs to be dealt with. Now I've set it up before where green has receipts and transcripts. Excuse me, receipts and invoices. Where purple maybe is work. You can change the name of these as you'd like. You can apply color to them simply by tapping on them and choosing to edit them. Now I don't have anything tagged currently, so you'll notice that there aren't any files, but we'll take a look at what that looks like. Before we do that, you'll notice that there's the favorites category. You can add to that by selecting one of these locations and choosing it as a favorite. But there are two locations that I want to talk about here besides recently deleted, which is where the files that you've deleted go after you've deleted them and they stay there for a period of time before they're finally removed entirely. If you choose to save something to the on my iPhone location, it will not sync across all of your icloud drive, so bear that in mind. If there's ever something that you just want to keep on your phone or your iPad, it'll say on my iPad instead. That's the place that you want to put it. If you want it to be available across your devices, it needs to go into icloud drive. Now on this page, if we tap the three dots in the top right corner, there's a button that says edit. So we saw scanned documents. We're going to talk about Connect to server in a moment, but there's an edit option. This is going to let us turn off or on locations and sort our locations how we might want them. So Maybe you don't want to have that on my iPhone location, you want to make sure that you're always saving to the icloud drive. This is a great way to do that as well. If you don't use certain tags, you can remove them. But most importantly, if you have an app that provides a location, which is a very specific kind of extension of the iOS and iPados and macrosos platform, that will show up here as well. So cloud document providers like Dropbox and Google Drive and Box, those will have locations that will show up here. And in fact, from the Files app, you can access then that Dropbox file that you have, Dropbox folder that you have, and that Box folder that you have, or your Google Drive folder, those will show up here. If you use the Adobe suite and you have an Adobe drive that can show up here as well. So those will show up in the Locations section. Now, finally, if we tap those three dots and we choose Connect to Server, here is where we could type in the name of a server. If it's specifically a URL that we've provided to it, or if it's local, then you can type in the IP address. You type that in, you hit return. If it requires a username and password, that will pop up next and you're able to do that. And then you'll have access to that server right here in the files window, just like you would if you were actually connected to it and browsing the directory that way. So now that we've taken a look at that, remember that in the Browse section, make sure you're on this main page. Choose the three dots and choose Edit in order to access access those extra locations. Because in many cases by default they may not appear here and you need to choose the edit to see them appear. So you can turn them on or turn them off. But let's take a look at what it is like to create some of the kind of extended effects of your file app. So if I tap and hold on ring Manual, I am provided with a huge list of options. I can copy it, I can move it, I can share it. We know what those do. Lets you move it to a different location, copy it, and then paste it somewhere else. Or use the share sheet to pull up a whole list of actions that we can do. Remove Download means that this file is currently downloaded locally to this device. And if we choose Remove Download, it will delete it from the local device, but keep it in the cloud. That's different from actually deleting Remove Download just gets Rid of it locally. Keep downloaded means that when your system is automatically clearing space by removing these local versions of your icloud drive files, it will not remove this one, it will keep this one downloaded. Quick look obviously gives you the ability to quickly look at a document and then from there we have get info which provides information about the document. So we can see that it's a PDF document, what its size is when it was created, and from here we can add those tags. So we could add let's say this gray are all of my PDF and documents we can choose done from there. Now this has a gray tag next to it. So if we go back to get info we'll see gray. And let's say that this also has something to do with home because you're wanting to access that information from home. If we go back to get info, we can see it's got gray, it's got home as the tags we tap and hold to move back into this menu. Rename, of course lets us rename the file to something else. Compress will actually turn it and others that you've selected into a zip file. Yes, you can create archives here. Duplicate makes a copy of it as you would imagine, but it just makes it right here where it currently is show in enclosing folder. This is specific to this recents page where you may not exactly be sure where it is located. So choosing that will show you oh that's right, I put this in my documents folder and then let's go back to that main recents we'll choose this again. Tags of course shows us the tags that it has. We can also remove tags or add new tags. And then quick actions have options like marking up the PDF or optimizing the file size, which is again something that is unique to the specific file type. So this being a PDF, we can optimize that file size, make it a little bit smaller, larger, depending on what we have. Lastly, delete will of course delete it and move it to browse that recently deleted location. Now let's take this file, let's tap on move and we're going to move it to the downloads section. If we go back to Browse and we go back to downloads, we can see all of these locations here. If you are wanting to add something to your favorites section, then what we would do is we would choose icloud drive and let's say you regularly view a folder in Documents. We'll add a new folder called oh, I don't know, recipes. If we tap on recipes and we're in this directory. Tapping in the top middle of the screen where the disclosure triangle appears or the little down arrow appears, we see the options to go back to Documents, go back to icloud Drive, keep this downloaded, get the info about it, and we're able to then add tags. And of course, if we want, we can head back to this main page here and take a look at our Favorites, including downloads, and make the adjustment here. But if we want to add something new to our Favorites page, then we will select the file, tap and hold and then choose Favorite. Now boom. It shows up under our Favorites menu. From there, if we want to take a look at the tags that we've created, remember that we added something to Home that will show up under that tag. Now I'm going to tap and hold on the home tag and whoops and take a look at this because we could change this to, if we can do it correctly, user manuals, like so. And now I know that all of my user manuals are stored here. Of course, I could just create a new tag as well if I'd like to do that. Let's take one more look at what it is like to share a folder. So let's say in our Documents folder we have a new trip coming up and we're calling it Japan 2026. And this is a folder that is going to have files in it that we want to share with other people. So what we do here is we tap on the Share icon and we can choose Collaborate or Send Copy. Now if you choose Send Copy, what it's going to do is send a copy of this folder to a specific person. But what we want to do is not send a copy, but Collaborate, which gives them an invite to this folder. They can add files to this folder and are able to access it that way. So I'll choose myself in this case and then send it to me, and then it will appear for me on my phone itself as it works to create this shared folder. Now you'll notice that the icon for Japan 2026 has changed to now have a an icon over it that shows that it's two people, meaning that it's shared. And it also shows up in the Shared section. You'll also notice that there's a little message icon next to it because that is how we went about sharing that folder and also that it has the log kind of of the changes that have been made. So now that I'm part of this, I could, because I'm on my specific device, I could add trying to think of something to move to this and I will put something into that Japan 2026 folder and then on the Japan 2026 folder I can tap on it and see check it out. There is the image that I put into that folder. Now I have some options including messaging with the other person who's part of this, managing the shared folder to remove or add people and whether those people can access it, can make changes or only view it, and whether they can also add people. And at any point you can choose to stop sharing using that options pane as well. So that is how we access the shared section of the Files app and of course within the Browse tab being able to access your various apps and services that you have across your device. That is a high level, low level look at the files app on iOS and iPadOS. Hopefully you learn something new about it. If you have used the Files app kind of in passing, that's a better look at what all is possible. It is a full sort of finder in comparison to macOS for sure. Thank you so much for tuning in this week. If you are not already, I'd love to invite you to join the Club Twit TV Club Twit. We've got monthly and yearly offerings. By joining the club you gain access to the ad free versions of every single one of our shows. The video versions of every single one of our shows Ad free. You also gain access to the Twit plus bonus feed that is extra content you won't find anywhere else behind the scenes before the show. After the show, special club Twitter events get published there. Access to the members only Discord Server A fun place to go to chat with your fellow Club Twit members and also those of us here at TWiT. So please be sure to join the Club TWiT TV Club TWiT. Thank you so much for your support. Thank you so much for tuning in. I'll be back again next week with another episode of Hands On Mac. Bye bye.