← All TWiT.tv Shows (Audio)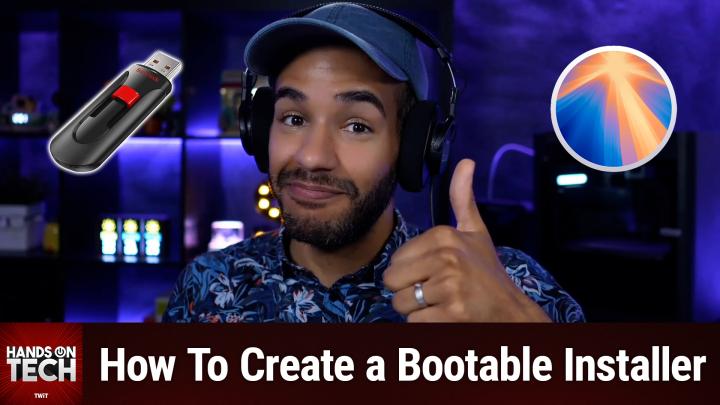
All TWiT.tv Shows (Audio)
Hands-On Tech 224: Creating a Bootable Installer for macOS
00:15:42
How To Create a Bootable Installer
Loading summary
Transcript5 lines
- [00:00]
A
Coming up on Hands on Tech, let's take a look at creating a bootable installer. No, not for Windows, but for macOS. Stay tuned. This is TWIT.
- [00:19]
B
This episode brought to you by Red Canary. When cybersecurity threats hit fast, you need an MDR partner that moves faster. Red Canary delivers 24.7expert MDR support, total visibility and actionable insights. Plus it helps you detect four times more threats so you can stay ahead without burning out. Red Canary clears the noise and has your back every hour, every incident. Get the backup you deserve. Visit redcanary.com difference to learn more. Today's show is brought to you by Progressive Insurance. Do you ever think about switching insurance companies to see if you could save some cash? Progressive makes it easy to see if you could save when you bundle your home and auto policies. Try it@progressive.com Progressive Casualty Insurance Company and affiliates. Potential savings will vary. Not available in all states.
- [01:13]
A
Hello and welcome to Hands On Tech. This of course is the show where I, Micah Sargent, take your tech questions and answer them. Yes, that is what we do. We go hands on with tech. By answering your tech questions. You write in HOTWIT tv that stands for and so on Tech. And when you do, I read through, I do some research and I get an answer for you. This week's question comes in from Rick who asks a simple question, but who will come to realize that it's a little bit complicated to go through the process. Rick asks, since we can't do things like buying macOS on a CD rom, how can we make a clean installer of macOS? Fantastic question. And it's a question that Apple has thoroughly documented. But what's funny is I often find myself having to go back to the documentation to remember myself how to create a bootable installer for macOS because Apple sort of does its best to encourage you away from it. So I guess that's discourage discourage you from using a bootable installer. In fact, the first thing that you see, well, the first sort of subhead that you see on the support page talking about creating a bootable bootable installer is the question do you need a bootable installer? Apple says you don't need a bootable installer to upgrade macOS or reinstall macOS. And that is the case. It's very true because of the way that macOS is set up at the base level. There's a sort of recovery, a built in recovery partition that exists that has the base system so that you are able to reinstall or reformat refresh Mac OS without needing to have a bootable installer. And even in cases where that base system gets corrupted, there's even more of an option to download a new version of macOS from the Internet if, if you have access to the Internet. And so I sort of laugh at the idea that Apple is very much about the idea of not using a bootable installer because many of you nerds out there I know love your bootable installers and I do too. I think it's important to always have that option so that if you need to, you're able to reinstall a fresh version of macOS without needing to access the Internet. Or what if there's something going on with the built in networking on the system? Well, suddenly you can't access the Internet. So creating a bootable installer is a good idea. Now the way to do so is by first getting a USB flash drive or an SSD or even you could even within the hardware itself create a little secondary volume that would have this startup disk built in. But regardless of where and how and what, the first thing to do is to Download the full macOS installer. Now this again is a tricky bit of the process because Apple doesn't make it simple and easy for you to just go and download macOS from the Internet. And if you are a sysadmin or you have some of the sort of behind the scenes knowledge, there are a few terminal commands that will let you download macOS and installer. But the way that Apple puts it out there and puts it forward and doesn't obscure it is to be able to download it from the App Store. So in order to Download and install macOS, the first thing to do is to go to the right link. Now we'll include a link in the show notes to a page called how to Download and install macOS. And on it you will see an option that says Use the App Store. So if you scroll down to that Use the App Store section, you'll find the version of macOS that you want to install. Let's say it's Sonoma. And so you click on that and what will happen is it's going going to ask if you want to open the App Store. When you do, it'll open the App Store, it will take you to the page for macOS. In this case I think we chose Sonoma. And you will have an option to click Get. You'll click the get button and it's going to start downloading the installer. Now here's the important part. When it finishes installing, or rather downloading, it's going to automatically open that installer. Do not go through the process. Do not click next and go through the process of installing. Because if you do, that installer is going to magically disappear from the Applications folder. Very annoying that that happens, but it does. So close out of it, don't pay attention to it, ignore it, make it go away, because otherwise it itself will remove from the Applications folder. And you need that installer. So once you have downloaded it, you're going to make sure that you have the DMG file on your local machine, which dmg just means disk image. And then by default again, it should be in that Applications folder. So you launch Finder, you click on Applications. One other note, we're talking about the system level applications, not the user applications, because your user also has an Applications folder. It's not in there, it's in the main Applications folder. Then our next step is to connect an SSD or a Flash drive, whatever you want to do, and pop that in and make sure that it has. For modern macOS, needs to be 32 gigabytes. For older versions of macOS, only needs to be 16 gigabytes. But Apple does not specify where that cutoff is. So my suggestion is make sure you have a 32 gigabyte or bigger flash drive. Then you're good to go. What you'll want to do, and this is part of kind of how much knowledge you have in Apple steps. Apple recommends renaming the Flash drive to my volume with the M capitalized and the V capitalized, because when you do, it will make it easier when you're going through the next steps of the process. Now, it's not necessary if you know what you're doing, because you will just properly fill in the text that you need to fill in. Because the next step is to open Terminal. And again, this is where things can get a little tricky. If you're not sure how to go about this. But Apple does provide every version of macOS the code that you type in, the text that you type in, the string that you type in from Sequoia all the way back to El Capitan. What you're doing is you are essentially creating this bootable installer on your Flash drive. That is what the process does. So here is if we can show that the support page, not the second one that says how to download, but the one that says create a bootable installer. Let's scroll down to use Terminal to create the bootable installer. You can see what we're doing here is we are essentially doing a little. We're opening a little script that's called Create Install Media, which creates an installable version and it tells it, I want to put it on a volume and the volume is called myvolume. If you have a different name for your Flash drive, you essentially just have to replace that thing at the end that says my volume with the name that you have for your Flash drive and then you're good to go. So it's going to go through the process. You've got to type in your administrator password because it's done with sudo. And then what's going to happen is, is you will get. Well, it could. It depends. You might get a message that says, hey, this is not working. You don't have a valid installer application. In that case, you may need to open up Disk Utility and actually repair the startup disk. But again, it'll walk you through this whole process. And there are some other potential issues that I'm not going to get into. But you can read here at the support guide. Once you go through the process, it's going to kind of erase this drive and put the bootable version on. And when it's done, it will say Install Media now available at. And it's going to change the name from my volume to Install macOS, blah, blah. So if you were doing Sonoma, it would say Install macOS Sonoma, and that will be the drive. Now, once you have the drive ready to go, once you have your bootable installer, since you can't have it as a CD rom, it's very easy to make use of it. So let's talk about how you do. If you have a Mac that has Apple Silicon, you need to shut down your Mac, turn off your Mac, you plug in your bootable installer, then you press and hold the power button on your Mac until you get to the startup options page, which will show you your bootable options choices. That should be your hard drive and this Flash drive. You select the bootable installer, you click Continue, and then it's going to open up the installer and let you move through that process. On Macs without Apple Silicon, you shut down, you connect it as you did before, you power it on, and you hold down the option key. When you get to the page that has the bootable volumes, then you just hold, you let go of the option key, you select it, and then you go through the process. So that is the way to go about it on Intel Macs and Apple Silicon Macs. Very simple, very easy to do to go through this process of not just creating the bootable installer, but making use of the bootable installer. So if you're running into issues where macOS is not, you know, playing ball and you can't get things working by just going into recovery mode and working through that way, that is how you create a bootable clean installer of Mac os. A really great question, Rick, and I appreciate you writing in with it because again, it's something that comes up far enough in between that I always have to go back and remember. Okay, now it's. It's. I think it's a. Yeah, it's a script that's inside of the installer and I've got to use Terminal to get. It's a little complicated, but if you follow step by step through the Boot Create a Bootable Installer for macOS guide, I think that you'll be a okay. When it comes to this, I want to remind you all about our wonderful offering that comes as part of Club Twit at Twit tv. Club Twit, when you subscribe monthly or yearly, you gain access to some awesome benefits. With Club Twit, you first and foremost get every single one of our shows ad free. It's just the content, none of the ads. In fact, we make some special little feeds that are unique to you. Your specific feeds with your name on them. And those feeds just have the content of the show. I think it's kind of cool to have this exclusive little direct connection between us to you. With those exclusive feeds, as well as access to our special Club Twit shows, we've got the Club Twit feeds, which include bonus content you won't find anywhere else behind the scenes, before the show, after the show, as well as access to our special Club Twit news events where we do live coverage of different news events that are taking place. Recently, Leo and I did WWDC together and access to our. I'm forgetting what. Oh, our, our shows. Our special Club Twitch shows. So for example, we have Micah's Crafting Corner where I and many people gather together and work on some different crafts that we do. We've got coffee time, we've got Chris Mark Wart doing his camera thing. So much more. All of that comes as part of your Club Twit package. And that is, I think we're coming up on like two full weeks of of programming that you gain access to the moment you join Club Twit which is awesome. And then, last but not least, you get access to the Club Twit Discord. That's a fun place to go to chat with your fellow Club Twit members and also those of us here at twit. If that sounds awesome to you as much as it does to me, you know, get to hang out with us, well, be sure to join the Club Twit tv. Club Twit. We'd love to see you, love to have you, and can't wait to celebrate with you. Thanks so much. Now back to the show. I remind all of you out there, if you have questions for me, you can get in touch. Hot TV is how you get in touch to ask your question. Thank you Rick for writing in and I'll catch you all again next week for another episode of Hands On Tech. Bye bye.
- [15:53]
B
No matter how much spare time you have, TWiT TV has the perfect tech news format for your schedule. Stay up to date with everything happening in tech and get tech news your way with TWiT TV. Start your week with this Week in Tech for an in depth, comprehensive dive into the top stories every week. And for a midweek boost, Tech News Weekly brings you concise quick updates with the journalists breaking the news. Whether you need just the nuts and bolts or want the full analysis, stay informed with TWiT TV's perfect pairing of tech news programs.
- [16:37]
C
Today we'll attempt a feat once thought impossible, overcoming high interest credit card debt. It requires merely one thing, a SOFI Personal Loan. With it, you could save big on interest charges by consolidating into one low fixed rate monthly payment. Defy high interest debt with a SOFI personal loan. Visit sofi.com stunt to learn more. Loans originated by Sofi Bank NA member FDIC terms and conditions apply. NMLS 696891.