← All TWiT.tv Shows (Audio)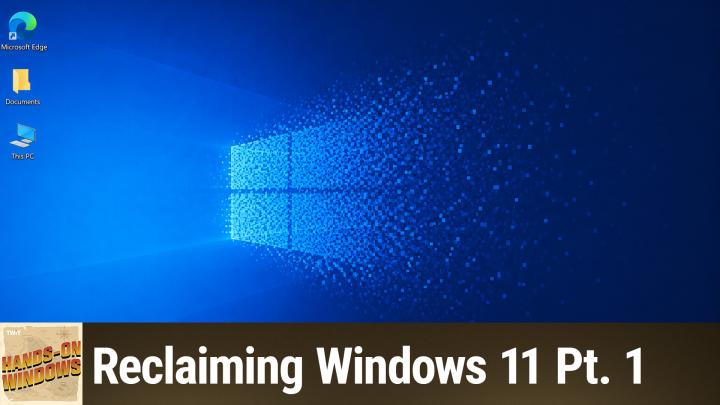
All TWiT.tv Shows (Audio)
Hands-On Windows 195: Strip Microsoft Out of Windows 11
00:17:55
From Bloat to Barebones
Loading summary
Transcript12 lines
- [00:00]
Paul Thurut
Coming up next on Hands on Windows is going to be the first of a two parter how to get the Microsoft out of Windows 11
- [00:10]
Sponsor/Ad Host
podcasts you
- [00:11]
love from people you trust.
- [00:14]
Leo Laporte
This is Twit.
- [00:19]
Paul Thurut
Hello everybody and welcome back to Hands on Windows. I'm Paul Thurat and as we've been discussing probably for years, Windows 11 quality has not always been the greatest. Microsoft we know is working on the pain points as they call them, but it's not really addressing the real insertification problems that I've identified a couple of years ago really. I had written a book earlier this year about deinsurdifying Windows 11. We did a couple of episodes that related to that, but I've decided to kind of go beyond that a little bit after experimenting with alternatives to Windows 11 like Linux for example, where you don't sign in with an online account but you can still secure the system in an adequate way or whatever. So some of this is really the types of processes we would have talked about before, but really aggressively in some cases doing the correct configuration in Windows 11 for you, which might mean no Microsoft account, it might mean no Microsoft apps like the store, OneDrive, Microsoft 365 apps, and aggressively if you want to be super aggressive, Microsoft Edge, etc. So I've been living in this kind of configuration across multiple machines for weeks. At the time of this recording, this particular computer that I'm recording on is one of those computers. Obviously I've already set it up to some degree, so I'll talk about some of the things that you do before you get to the desktop real quickly. But these are things we've talked about. Of course, I and others have written about this on the web and so forth. So as far as initial setup goes, you get a new computer, you've reset an existing computer, whatever it is. Obviously you can use tools like Tiny 11 Builder if you really want to strip down the the image that Windows has on disk. But for all the installs I've been doing for this round, this is just the normal Windows 11 install when it's a computer where I can reset it myself with, you know, outside of the os I've used Rufus. But you don't actually need to do any of that stuff because you can bypass all the stuff you want to bypass easily enough. And one of the big ones is if you want to sign in with a local account, which I did do. So you can see that here, this is just a local account during setup, when you get to the screen where you connect to A wireless network. You type shift +f10, bring up a command line window and then you type in. I'll type it in here, not that this makes any sense at all, but I'll try to type it in here. If I can UBI bypass nro, which I've now memorized because I do it so much. Hit enter, the computer will reboot and I locked it. So the computer will reboot and come back into setup. And then you go through the process and you go through a really stripped down version of setup. The only big thing there is you can create your account, you don't need a password, which is the way I did this initially. And then you go through that privacy screen where you choose those options there and that's about it. And you get to a desktop that's super bare bones. So once you do get to the desktop like we have here, you connect to your wireless network. This is connected to Ethernet, but also I could connect to wireless separately. But either way you connect to the network, your start menu will start to fill out. This is previously mostly empty. And then you can go through this kind of normal first time configurations that everybody does. Now this particular thing I just noticed, this is actually one of the things I did not do and should do, which is you adjust the date and time if it's not correct, which this is not correct. And that's because for some reason this often is set to not set the time zone automatically. So just by doing that, now it's on the right time and that's great. Go into Windows Update. I don't need to do this here, this has already been done. But check for updates. If you want to get the latest updates, meaning you're going to get preview updates, do so as you start to get the updates, be sure to go into advanced options, optional updates, and then if you have any here, install any of the drivers that you see, you definitely want to do that stuff while that's happening, definitely go into the Microsoft Store as well. Even if you don't think you're going to use the Microsoft Store right and just check for updates and this will update all of the, or I should say most of the apps that are pre installed on the computer. So it's just something these two things will be happening in the background as you do other things. And eventually Windows Update is going to prompt you to reboot. And after you do reboot the computer, you're going to want to check for updates again here and also in the Microsoft Store until they're all done right and that's just kind of a standard practice. But the way that this system was set up was with a local account and not a Microsoft account, like an online account and more so or just as important, I guess. I also never created a password. So the first thing that I do while those updates are recurring is go into settings and then accounts and then down to sign in options. And I actually create a password and a PIN and whatever Windows hello authentication capabilities are available. I will also do those personally. So you need to have a password to set up a pin. Once you do have a password, it will actually, I think it will prompt you to set up a PIN eventually, but I've already done that. So I have these. This particular computer is a review unit. It's kind of curious in that it actually does not have facial or fingerprint recognition built in. It's the first time I've seen that in several years. But normally I do enable those on whatever computer I'm using. A couple of other things that I like to do, I turn off this option here, use the sign in information to automatically finish setting up after an update. This is that screen that pops up, the white screen that looks like setup. It's like, hey, you should turn on folder backup or whatever. And it's like I just, I don't ever want or need that. I just. This will disable that from happening, which is nice. And if this bothers you, you can also go into your info and add an image here for your, you know, so it's a little weeble looking thing. I'm not going to do that here. But if you know this is like one of those things you get automatically with a Microsoft account, but you can do that here. Now if you're not totally anti Microsoft account, if you understand that you may be using it for things like Microsoft 365 apps or OneDrive perhaps, or the Microsoft Store itself or any store apps that you might install from that location. You can add that not as a sign in account but rather as an authentication method. And the way to do that, go into accounts, your accounts and you can add a Microsoft account or a worker skill account. So this is not a sign in account. This is an account you're going to use to sign into other apps right from within this local account. I've already done that. I've done this for my Microsoft account. I made sure that asks. They will ask. All apps will ask. This will not just happen. It's not going to pass through automatically. The reason I did that was because on this Particular computer I did set up OneDrive and I wanted that to be connected to my Microsoft account. And so it is. And it's already all, you know, configured and so forth. So that's something you can do. Now as this is occurring, of course, updates are also happening. But the next big thing, and this is super important, is to go into settings and privacy and security and then go into device encryption. Now, I've already enabled this, but when you sign in with a non online account, a local account drive encryption is not enabled. It's super important that you do that because otherwise, if somebody gets a hold of a computer can remove the storage, they could connect to it and get to whatever data is on there. And the way you do this is going to vary. Unfortunately. If you have Windows 11 Home, to do it through this UI, you actually have to sign into a Microsoft account. However, if you have Windows 11 Pro, you can click this BitLocker Drive encryption option and you can just turn it on here, which is how I did that here. You do have to save the encryption key somewhere so you can print it, which is probably silly in most cases. You can save it to another location if, if you have a USB disk or network location, whatever that is. I saved it to a network share in my case, but you can do that and then you're off and you're running and it's all great. If you do have Windows 11 Home and you don't want to sign in with a Microsoft account, which I do understand, there are sites on the Internet where you can buy product keys for Windows 11 Pro for as little as $9 to $10. And right now this one is 1090, for example. So you can Google this. It's very easy. This works great. I've done this on multiple computers both recently and in the past. So that's absolutely an option. If you just like, look, I just don't want to use the Microsoft account. I also don't want to pay $150 for an upgrade. You can just get a key online. It's legal, it's safe, it works fine. There's nothing wrong with that. So that's fine. The next step then would be to start removing the things that you do not want. Right? Because this is a stock install of Windows 11, right? We didn't do anything special. We didn't use Windows, we didn't run win 11 debloat, we didn't use tiny 11 builder to change the install. So this just the normal stuff would be on here by default. And you can do a Lot of that through the Settings app or even through the Start menu in some cases. But the thing I like to do is open the old Control panel. You can find that in Start Search. And this is already. I've already done it here. And then of course it's showing some other things I've installed since. But the types of things you'll see in here would be Microsoft 365, if you want to remove that. OneNote is often a separate. Even though it's part of Microsoft 365, you'll see. And actually here you will see, because I did not remove it OneDrive and depending on your PC maker, you might see a few other things in here as well. So this is a nice way just to get rid of that. Basically, the Microsoft stuff is kind of the thing I'm looking for. The big Microsoft stuff. From there you can and should go into the Start menu. You know, get rid of any of the junk that is on here from your PC maker from Microsoft. Like WhatsApp is actually a really good example. You could uninstall or unpin. It doesn't really matter. This app isn't even really installed. But if you do it from here, it's pretty quick. Obviously you can go into the All Apps list, which is now on the front page of Start, and go through this list. You could also just go into Settings app and then go to Apps installed apps and then just go through the list, you know, and as you kind of go through this, like, oh, no, I don't want that. I don't want that. You can just uninstall directly from the side. I routinely uninstall pre, you know, pre bundled apps that are, you know, part of Windows that I just don't need. Like the News app, which I consider superfluous, or whatever is in there. It's, you know, obviously up to you. All right, we got one more thing to do. But first, let's take a quick break.
- [11:16]
Sponsor/Ad Host
Hey, Paul. Hey, everybody. This episode of Hands on Windows brought to you by thinkst Canary. Oh, I love our thinkst Canary. In fact, it's the only way to tell if somebody has breached your network. What is a Think Scannary? It's a honeypot that's easy to deploy. It can be deployed in minutes, but it's absolutely vital because if somebody is accessing those lore files you can make with your things. Canary are brute forcing your Thinks Canary posing as, let's say, a fake internal SSH server. It can be anything. Your Thinks Canary will immediately tell you you got a problem, there's somebody in the network. No false alerts, just the alerts that matter the way you want them. Just choose a profile for your Thinks Canary device, Windows Server, Linux Server, SCADA Device, wireguard Device, register it with the hosted console for monitoring and notifications, and then you just sit back and relax. Attackers who've breached your network, malicious insiders and other adversaries cannot help but make themselves known by accessing your Thinkst Canary. Visit Canary Tools Twit Just $7,500 a year gets you five thin canaries, your own hosted console, upgrades, support and maintenance. And if you use the code Twit in the how did you hear about us? Box, you'll get 10% off the price. Not just for the first year, but for life. And don't worry, you can always return your thinkscanaries with their 2 month money back guarantee for a full refund. I should tell you though that during the 10 years we've been doing ads for Thinks Canary, their refund guarantee has never once, not once, been claimed. Visit Canary Tools slash Twit Enter the code Twit in the how did you hear about us? Box for 10% off thinkst canary at Canary Tools. Twit. Now back to Paul.
- [13:01]
Paul Thurut
Alrighty, so updates are occurring. You might have rebooted by this point. You've encrypted the disk, you know, apps have updated, etc. In the next episode we're going to go further into, you know, app install and configuration, installing some cloud service type things and so forth. But there's a couple of quick things that I really like to do right up front. For example, if you are going to use OneDrive, OneDrive will want to turn on folder backup. We've talked about this, you might want to go in there and just make sure that's not happening. That's a good thing to do. By default it will show this on this day notification where it just pops up a thing that says hey, it's whatever date this is. What the photos. These are the photos you have from this day in the past. I hate that so much. I don't mind it on my phone but I don't want it on my computer. So I decided turn that thing off. There's the date and time thing. Like I said that, you know, it's in the time zone, but one of the big ones is just File Explorer. By default this thing is set to go into a home view which has a bunch of stuff in it which I have already disabled. But I'll show You what I do here, which is there are, depending on how you're configuring this, there are going to be three or four options here in the privacy on the front first page. When those are checked, there's still nothing there. But typically that would fill this out a little bit more. So I uncheck those things. This kind of speeds it up. You know, Microsoft is doing work to speed up File Explorer in Windows 11 this year, but it's just not there yet, so there's no reason not to do this. And then I also have it just booted or open up to the this PC display, right, which is like the old my computer, which is this view here. So I just have a single drive on this computer. So there's not really not much to look at. But the point of this is just to make the thing come up fast. When I load this thing, it's fairly immediate. Whereas this page, especially when you have the other stuff, takes some time to load. The other thing you can do, whether you're using OneDrive or not, is you can actually remove the gallery. To do that, there's actually a. It's a registry change you have to make. I could probably find it pretty quickly, but I have a registry, a Registry file that you can just run, which makes that change in the registry and then it will remove the gallery. I think you might have. I don't know if I have to restart Explorer reboot to see that, but yeah, it's already gone. So just get rid of that thing. I don't use it. I don't like it. I don't like when I click on it by mistake and all these images pop up. It's not the way I do things. So this is subjective. It's up to you, obviously, but that's one of those things that I really like to change every time in File Explorer. I just. I cannot stand it. Okay, so in the next installment, which is the second part of this, we're going to look at installing apps, like I said, managing app installs as well, especially web browsers, which are kind of a unique case. Disabling the copilot key, always good. Disabling, tracking, cloud storage and lots more configuration changes. So next week we'll continue this. And the goal at the end, again to your preferences is to remove as much of this stuff that is from Microsoft that you may or may not want. Well, you remove the things you don't want, right? And this is going to be different for different people. Some people are fine with all of it, some people will definitely want to remove a lot of it. And I have to say, in the weeks that I've been doing this, removing a lot of the stuff has made me really appreciate how good a computer can be because there's not a lot of stuff going on because someone's not trying to sell you on things or change your browser settings or whatever it might be. So it's actually, it's kind of a desirable configuration from my perspective anyway. So I hope you found this useful. We will have a new episode of Hands on Windows every Thursday. You can find out more about that at TWIT tv. H O W thank you so much for watching. Thank you especially to our Club TWIT members. If you're not a member, please consider joining. You can find out more about that program at TWIT TV Club Twit. Thank you. I'll see you next week.
- [17:14]
Sponsor/Ad Host
Hi there, Leo laporte here. I just wanted to let you know about some of the other shows we do on this network you probably already know about. This Week in Tech Every Sunday I bring together some of the top journalists in the tech field to talk about the tech stories. It's a wonderful chance for you to keep up on what's going on with tech, plus be entertained by some very bright and fun lines. I hope you'll tune in every Sunday for this Week in Tech. Just go to your favorite podcast client and subscribe this Week in Tech from the Trip Network.
- [17:52]
Paul Thurut
Foreign
- [17:56]
Leo Laporte
you can't reason with the sun. Trust us, we've tried. This summer, it's time to put that angry ball of fire on mute. Columbia's Omnishade technology is engineered to protect you from the sun's harsh rays that can burn and damage your skin. The sun is relentless, but so is our gear. Level up your summer@columbia.com to spend more time outside and less time slathering on aloe lotion. You're welcome. Columbia Engineered for whatever
- [18:25]
Sponsor/Ad Host
the right window treatments change everything. Your sleep, your privacy, the way every room looks and feels. @blinds.com, we've spent 30 years making it surprisingly simple to get exactly what your home needs. We've covered over 25 million windows and have 50,000 five star reviews to prove we deliver. Whether you DIY it or want a pro to handle everything from measure to install, we have you covered. Real design professionals, free samples, zero pressure right now. Get up to 50% off with minimum purchase plus get a free professional measure@blinds.com rules and restrictions apply.
- [18:58]
Athletic Brewing Company crafts award winning non alcoholic beers for those who want to be part of every round. With over 185 flavor awards, they're exceptional NA beers that fit your lifestyle and any social occasion. Summer's full of good times, and Athletic fits right in. Go to athleticbrewing.com to have brews delivered to your door, or find them at a bar, restaurant or store near you. Near Beer Athletic Brewing Co. Fit for all Times.