
Podcast
Step-by-Step Online Business
Hosted by AI bots (and Virginia Stockwell, Business Coach & Kajabi Expert) · EN
Tired of podcasts that just TALK about business? The podcast "Step-by-Step Online Business" is different. Here, it’s all about action. Each episode gives you straightforward, actionable steps to build, launch, and grow your online business. If you’re ready to stop dreaming and start doing, press play!
20episodes
Episodes
Newest firstAll episodes

Copywriting Gold: From Meh to Magnetic - check out the show notes
Feb 25, 202500:13:25Tap to summarizeIt can make or break your personal brand. Those words you sprinkle on your website, ads, and emails can either captivate your audience or make them scroll right past. It’s not as complicated as you think! I'm about to arm you with some golden nuggets to create copy that grabs attention. Words that Wow #1 Change your timeline to upgrade the impact. EXAMPLE 👇👇👇 Words that Wow #2 Describe the transformation a student/client is going to receive by going through your program. They are not actually buying your program, they're buying a transformation (moving from point A where they are now, to point B where they want to be). Avoid focusing on WHAT it is you're teaching them and instead focus instead on what they're going to gain from your teachings. EXAMPLE 👇👇👇 Words that Wow #3 The more specific you are in your copy, the more likely your target market will read it and say "wow, that's me!" which causes them to pay more attention to what you have to say next. EXAMPLE Words that Wow #4 The more specific the promise you're making, the more powerful the headline comes across. EXAMPLE👇👇👇 instead of this... NO (too vague) My acrylic painting course covers the subject of: preparing a canvas choosing paintbrushes mixing colors try this... YES (precise) By the end of this course, you're going to be able to: gesso linen canvases to prepare for a painting session choose the right paintbrush for fine, precise lines using just three primary colors, mix the exact shade of your subject's skin color EXAMPLE👇👇👇 Words that Wow #5 Images and sub-headlines can slow down the urge to skim a page, potentially skipping important parts of the copy. E 👇👇👇 Words that Wow #6 Use a bigger timeframe to make a number have more impact. EXAMPLE 👇👇👇 Sales Page, "Earn $5,000 a month with our online course." Timeframe Enhancement: "Earn $60,000 annually after completing our online course." EXAMPLE 👇👇👇 Sales Page, "Get 300 new leads in your first campaign." Timeframe Enhancement: "Grow your audience by 3,600 new leads over the next year." EXAMPLE 👇👇👇 Sales Page, "Save $25 a month with our membership plan." Timeframe Enhancement: "Save $300 annually with our exclusive membership." EXAMPLE 👇👇👇 To wrap it up, here are 6 copywriting tips to keep in your back pocket as you work your magic: Know Your Audience: Write like you’re having a conversation with your ideal client. Start with a Hook: Grab attention in the first sentence, or risk losing your reader. Keep It Simple: Forget jargon. Clarity always beats cleverness. Focus on Benefits: Show how your product or service solves their problem, not just what it does. Break It Up: Use short sentences, bullet points, and white space to make your copy easy to skim. Write, Then Edit: Your first draft isn’t your best draft. Cut the fluff and polish it up. Great copy doesn’t just happen. It’s a skill you refine over time. 👇👇👇 Trying to learn online marketing while also launching your course or membership can feel like a lot. Yes, you could jump right into creating your course or membership today. But the truth is that just having a course doesn’t mean it’s going to sell. The success of your online business isn’t about the product itself. It’s about your ability to attract, engage, and convert the right audience. Without a clear marketing strategy, you’ll end up frustrated, wondering why no one is buying. Yes, I'd like Marketing Guidance and Kajabi Help
Transcribe →
How to Film Your Online Course - check out the show notes
Feb 18, 202500:16:43Tap to summarizeThis question comes up a lot! At the beginning, creating an online course seems like a huge, complicated project, but when you break the whole process into smaller steps, it becomes doable. Filming your course is the most exciting part. It's your ideas and expertise coming to life! If you’re completely new to online courses, know that you don’t need to be a professional filmmaker or have a Hollywood-style film studio to create it. Using the tools you have right now, you can film a course that looks great, sounds great, and makes your audience excited to learn from you. 👉Step #1 - Choose one of the three types of filming for an online course. 1. Talking Head This involves filming yourself speaking directly to the camera. It’s great for building a personal connection with your audience, sharing information, and explaining concepts. It works well if you're including hand demonstrations, using a whiteboard, or engaging in a lecture-style presentation. 2. Screen Share This method is ideal for demonstrating how to use software, presenting slides, or navigating digital tools. You record your computer screen while narrating the process. 3. Over-the-Shoulder Filming This style combines the two techniques above and is especially useful for hands-on tutorials or physical demonstrations. Over-the-shoulder camera angle: Perfect for tasks like cooking, crafting, or tech setups where viewers need a detailed view of your hands or workspace. Split-screen editing: A view of your talking head alongside a screen share or demonstration to provide context and personality while showing technical details. 👉Step #2 - Choose the platform to film your online course. Kajabi - Includes built-in tools for recording coaching sessions, group webinars, or course videos. Great for all-in-one content hosting and management. 30-Day Free Trial here. Zoom - Ideal for recording with or without screen share that can later be edited into course material. Loom - Simple and fast for quick screen recordings with voiceover. Each platform offers unique features, so your choice will depend on your level of experience with filming and editing. FAQ How long should my videos be? How do I create an outline or script? How do I organize my content into videos? How do I make my videos interactive? I've covered much of these questions in my other article, Step-by-Step How to Structure an Online Course P.S. Subscribe to my weekly newsletter here if you like this kind of content. 👉Step #3 - Gather filming equipment. You don’t need to splurge on high-end gear to create a professional-looking course. Many successful course creators began with just a smartphone, an inexpensive microphone, and a naturally lit room. What matters most is the value you’re providing to your audience, so focus on making your content shine, and don’t stress about having the perfect gear. 1. Camera Beginner Option: Start with what you have! Most modern smartphones have excellent cameras that can record high-quality video. Just make sure to use a tripod to keep your shots steady. Upgrade Option: If you’re ready to invest, consider an entry-level DSLR or mirrorless camera like the Canon EOS M50 or Sony ZV-E10. These provide great quality without breaking the bank. Pro Tip: Ensure your camera can record in at least 1080p HD for clear, sharp videos. 2. Microphone Audio quality is just as important (if not more) than video quality. Even with great visuals, poor sound can turn people off. Beginner Option: A lavalier (clip-on) microphone like the Rode SmartLav+ is affordable and works with most smartphones or cameras. Upgrade Option: A USB microphone like the Blue Yeti or Samson Q2U is perfect if you’re recording in a quiet space and don’t need to move around much. Pro Tip: Record in a quiet room and test your audio before filming to avoid echoes or background noise. 3. Lighting Good lighting makes a huge difference in how professional your videos look. Beginner Option: Use natural light by filming near a window during the day. Just make sure the light is even and doesn’t cast shadows on your face. Upgrade Option: Invest in a ring light or softbox lights for consistent, flattering lighting. A popular option is the Neewer Ring Light, which is easy to set up and afford...
Transcribe →
How to Write Messaging for a Sales Page - check out the show notes
Feb 11, 202500:16:12Tap to summarizeYou've probably heard the advice "know your audience" when crafting messaging for your sales page. It’s one of those phrases tossed around in digital marketing like it’s the golden key to success, but what does it actually mean? Does it mean reading their minds? Guessing their problems? Following some magical checklist that everyone but you seems to have? For most people writing a sales page, “know your audience” sounds frustratingly vague and can even feel like a roadblock when you don’t know where to start. When you don’t know exactly who your audience is, it’s like trying to have a conversation in a language they don’t speak. You might be throwing out ideas or solutions, but not capturing any attention because you're not addressing the frustrations your audience is actually facing. What problems are they struggling with (that you have the solution for)? What outcomes are they desperately seeking (that you have the solution for)? Without clarity, it’s nearly impossible to position yourself as the person with the answers they need. This disconnect can lead to a sales page that feels generic or confusing and one that doesn’t resonate and, ultimately, doesn’t convert. W 👉Whether you’re building your first sales page or trying to fix one that’s falling flat, understanding your audience is the essential first step to crafting messaging that connects and compels. What are they frustrated by (that you solve)? What solutions are they searching for (that you have the answers to)? What exactly does "know your audience" mean? If you’re in the process of writing a sales page for an online course, coaching program, or membership, these steps will help you write messaging that feels like a conversation with a friend rather than a generic sales pitch. Before you can write a single word, you need to know who your ideal customer is. Think of this as creating a character for your messaging. The more specific you get, the easier it becomes to write words that feel like they’re speaking directly to them. This clarity doesn’t just help you write better. It also causes your audience to feel seen and understood. When you show your audience that you understand where they're coming from, they will assume you have the solution to their problem (because you do) and will be more compelled to purchase your services or program. 👉Messaging Action Step #1: Pinpoint The Challenge (that you solve) Your audience isn’t coming to you because everything is fine. They’re searching for solutions to something they’re struggling with. When you understand their pain points, you can position your offer as the perfect remedy. That's messaging that instantly grabs attention and builds trust because it’s clear you "get" them. Be specific in defining your audience's biggest challenge (that you have the solution for). Instead of saying, “they’re overwhelmed,” move past surface level and consider the internal struggles that keep them from moving forward. Are they a new entrepreneur trying to juggle business and family life? Are they frustrated because they’ve tried other solutions that haven’t worked? Are they nervous about making an investment because they’ve been burned before? Example: “Megan is a busy mom of two who dreams of launching her own coaching business but feels overwhelmed by all the tech and marketing advice online. She’s frustrated because every program she’s tried assumes she already knows the basics, and she’s starting to doubt if she’s cut out for this.” 👉Messaging Action Step #2 Define The Achievement (that you help with) Your ideal customer isn’t just defined by their pain. They also have goals. It’s not enough to know their struggles. You also need to know what success means to them. What's their dream outcome when their problem is solved? By showing them how your solution bridges the gap between where they are now and where they want to be, you’ll create messaging that’s both relatable and inspiring. What are they hoping to accomplish with your help? “They want to feel successful” isn’t enough. What does success look like? Maybe they want to launch their first course in 90 days. Maybe they’re looking for strategies to grow their email list to 1,000 engaged subscribers. Knowing what success looks like to them will shape how you position your offer. Example: “Megan’s dream is to create a sustainable coaching business that allows her to work from home while earning enough to pay for family vacations. She wants a step-by-step system that’s actionable and doesn’t assume she’s a tech wizard.” 👉Messaging Action Step #3 Design Your Approach (how do you help) Now, bring their personality to life. Are they analytical and detail-oriented, or do they prefer big-picture strategies? Are they the type to research thoroughly before making a decision, or do they value quick wins and action? This helps tailor your tone and approach. For example, a detail-oriented customer might appreciate thorough explanations and examples, while someone more action-focused might prefer bullet points and concise steps. Example: “Megan is practical and action-oriented but gets overwhelmed when there’s too much information at once. She values efficiency and proven strategies. She’s not looking for fluff. She wants real-world advice she can trust.” 👉Messaging Action Step #4: Visualize 1 Audience Member (that you're writing all your messaging for) Pull all this together into a short profile, like this: Profile Example: “Megan is a 38-year-old mom of two who dreams of launching a coaching business. She’s overwhelmed by conflicting advice online and frustrated with programs that assume too much technical knowledge. Her goal is to create a sustainable, family-friendly business that pays for her kids’ activities and family vacations. Megan is practical and action-oriented, preferring step-by-step guidance and real-world strategies over fluff. She values clarity, efficiency, and suppor...
Transcribe →
How to Add Gamification into Your Coaching or Consulting Business - check out the show notes
Feb 4, 202500:18:20Tap to summarizeGamification is such a buzzword these days. As a coach or consultant, it's creating points, badges, leaderboards and challenges to make everyday activities more engaging and fun. Your clients love it because it taps into basic human psychology. We’re naturally motivated by things like achieving goals, gaining recognition... and friendly competition. Instead of feeling overwhelmed inside your program, gamification cause the task list to feel like you’re playing a game. For example, you could create challenges in your Kajabi community such as a 30-day goal to complete a course, then reward those who participate with exclusive content or private coaching. You can also use leaderboards to showcase top contributors. Action 1: Set Program Milestone Goals Milestones: Outline the goals or milestones your clients should achieve (completing a module, implementing a strategy, hitting a personal target). Tracking: Use Kajabi’s course progress tracking feature to see how each client is progressing. Reward: Assign points, badges, or certificates for completing milestones. Use personalized congratulatory messages. Action 2: Design Interactive Learning Modules Quizzes: Add quizzes to your Kajabi course (tailored to your program). Drip: Set up Kajabi’s drip-release feature to unlock new content as clients progress. Multimedia: Use multimedia (videos, infographics, PDFs) to add to the learning experience. Recap: Include end-of-module challenges where clients summarize what they’ve learned and how they’ll apply it. Connecting the course to a community allows challenges to be implemented. Action 3: Introduce Engagement Activities Tasks: Assign real-world challenges, such as applying a learned skill immediately before moving to the next module. Automations: Set automations to cheerlead clients along as they complete one module and approach another. Incentivize: Offer a reward (private coaching, exclusive resources, coupon code) when clients complete a module. Weekly: Assign short, actionable tasks clients can complete quickly to build momentum. Worksheets: Provide downloadable resources or templates they can fill out as they progress. Action 4: Add Competitive Elements and Leaderboards Leaderboards: Within the community, use the leaderboard to encourage friendly competition. Participation: Highlight top performers in your email newsletters or community posts. Competitions: Divide your community into groups and reward the most collaborative or successful team. Events: Organize limited-time competitions tied to holidays or specific themes. Action 5: Implement Reward Systems Rewards: Choose tangible incentives, such as discounts on future services or exclusive access to bonus content. Automate: Optionally, use Kajabi’s offers and email sequences to automatically deliver rewards upon task completion. Rewards: Let clients choose their reward from a predefined list, such as coaching calls, resources, or discounts. Bonus: Unlock exclusive lessons or content when clients achieve key milestones. Physical: Offer branded merchandise or mailed certificates for significant accomplishments. Recognition: Create a “Wall of Fame” in your community or website to showcase top clients. Action 6: Provide Instant Feedback Scoring: Set up quizzes in Kajabi with instant feedback for correct and incorrect answers. Badges: Award badges for specific achievements, such as completing a module or mastering a skill. Action 7: Build a Community for Collaboration Community: Set up a dedicated space where clients can interact, share progress, and participate in group challenges. Teamwork: Launch group activities and challenges within the community, encouraging peer learning and support. Celebrate: Post shout-outs for achievements to motivate others and build camaraderie. Action 8: Self-Assessment Tools Reflection: Incorporate self-assessment quizzes and surveys in your Kajabi courses to help clients evaluate their own progress. Content: Create engaging simulations or role-play scenarios that clients can complete within the platform. Logs: Encourage clients to maintain a personal log of lessons learned and applied. Checklists: Provide downloadable checklists to help clients measure their own growth. Scenarios: Add “what would you do” exercises to reinforce decision-making skills. Step 9: Get Feedback Request: Use Kajabi forms or surveys to collect feedback on the gamified experience. Strategies: Update challenges, rewards, and tools based on client preferences and results. Step 10: Host Live Gamified Events Challenges: Host real-time competitions during webinars or live sessions. Trivia: Organize fun, educational trivia events related to your course topics. Q&A: Gamify Q&A sessions by awarding points for insightful questions. Work with Virginia website audit set up your community digital marketing course personal email support do it for me service 1:1 Zoom tutorials 30 day free Kajabi trial <a class="wNXfUmwVHEHtvFOczjBCXZmEBwNXfXbqg " target="_blank" href="https://plainlylegal.com/?ref=virginiastockwell" rel="noopener noreferrer"...
Transcribe →
How You Know if Your Online Course is Going to Be Successful - check out the show notes
Jan 28, 202500:18:12Tap to summarizeSo, you have an idea for an online course that you’re super excited about. Before you spend the next few months filming, you should make sure your idea has what it takes to succeed. That’s where an Online Course Feasibility Rating comes in. This rating score is your reality check in whether your course idea is ready to launch or if it needs a little more love to stand out in the market. Scoring System: Online Course Idea Feasibility Rating Scorecard For each of the below questions, rate each criterion on a scale from 1 to 5: 1 = Low feasibility 5 = High feasibility Add up the scores at the end for a total feasibility score out of 30 points. Ready? Begin... 1. How easily can you develop the course content? Do you already have expertise in this area? 1 Requires significant research or new skills 3 Moderately challenging but manageable 5 Effortless, based on existing skills and knowledge 2. What are your financial requirements for creating the course? (hosting platform, filming, marketing) Are there ways to minimize costs? 1 High upfront costs 3 Moderate investment required 5 Minimal to no upfront costs 3. Can the course be sold repeatedly without much additional effort? Does it have the potential for passive income? 1 Highly dependent on live delivery or one-off sales 3 Moderate potential for automation 5 Fully scalable with automation 4. Is there a large enough audience interested in this topic? How niche is the idea? 1 Small, niche audience 3 Moderate audience size 5 Large, broad appeal 5. How competitive is this niche? Can you stand out with your unique approach? 1 Highly saturated market 3 Moderate competition 5 Limited competition or unique angle 6. How quickly can you launch the course? Are there external factors that might delay progress? 1 More than six months required 3 Three to six months to launch 5 Less than three months to launch Total Feasibility Score Add up the scores for all criteria. 25–30 Highly Feasible 18–24 Feasible with some challenges 12–17 Moderately Feasible, reconsider 6–11 Not Feasible Next Steps Highly Feasible (25–30): Move forward with developing this course. Feasible with Challenges (18–24): Identify and address obstacles before proceeding. Moderately Feasible (12–17): Reevaluate the idea or adjust your approach. Not Feasible (6–11): Explore alternative course ideas. Is Your Score a Low Feasibility? If your course idea gets a low feasibility score, it’s not the end! Think of it as valuable feedback to help you refine and improve. Start by taking a closer look at your target audience and getting clear on who your course is for by conducting surveys and engaging in forums. Validating your idea is possibly by testing with a freebie, a poll, or a mini version of your course to gauge interest. Pre-selling your course is also great way to confirm demand before fully committing. Next, consider what makes your course stand out? Whether it’s your teaching style, the specific problem you solve, or a unique framework, emphasize what makes your offer special. If your idea feels too broad, consider niching down to solve one specific problem for one specific group of people. Specialized courses often perform better than generalized ones. Improving your market positioning is another important step. Polish your messaging and branding to make your course irresistible. If you’re new, build credibility by offering a beta version of your course for free or at a discount, and use the feedback and results to improve your offer. Review your pricing strategy. Sometimes a high price suggests exclusivity, while a lower price makes it more accessible. Consider offering tiered pricing or bonuses to create more value. Finally, don’t give up! Every successful course creator started somewhere, and a low feasibility score is just a sign to tweak your approach, not abandon your dream. Treat this as an opportunity to learn, grow, and create a course your audience will love. Your Success is Inevitable! 💖
Transcribe →
How to Attract Buyers for your Online Course - check out the show notes
Jan 21, 202500:17:05Tap to summarizeAre you looking for step-by-step marketing guidance on what actions to take each day? You're going to receive actionable daily tasks that will move your online coaching or consulting business into profitability. One Email. One Task. Five Days a Week. One Step a Day. START TODAY. You have an idea for your online course (or you've already created it). But...how do you get people to buy it? How does your audience find out that you even exist? You may be surprised to hear that what is going to set you and your course apart from others in your niche is not what you think (your education, your skill, or your amazing course). The secret is actually in your ability to market for leads and convert those leads into buyers. Did you know that the average conversion rate for those on your email list is 2% to 5%? If you have an email list of 1,000 people, then 20 to 50 people are likely going to purchase. Look at your numbers right now. How big is your email list? Marketing overall is about creating an experience that grabs your audience's attention, builds trust, and makes them say, “you're exactly who I’ve been looking for!” If you’re currently overwhelmed by all the marketing jargon, tech setup, or just figuring out where to start, you’re not alone. With a well thought out plan of strategy, you can absolutely attract buyers and turn your knowledge into a thriving revenue stream. It isn’t about luck. It’s about using proven tactics to connect with your ideal audience and show them the value you’re offering. Step #1 Build a Professional Online Presence Step #2 Leverage Lead Generation Strategies Step #3 Master Marketing Funnels Step #4 Utilize Community Building ...plus Bonus Content Your success is inevitable! TELL YOUR AUDIENCE ABOUT IT! Step #1 Build a Professional Online Presence To get buyers into your online course, your website needs to shine as the ultimate first impression. This is where potential students decide if your course is the right fit for them, so it should be inviting and conversion-focused. Strategy A: Build a Conversion-Focused Landing Page Your landing page is your course’s “front door,” so it needs to grab attention and make your offer clear. Here’s how to make it irresistible: Write a Compelling Headline: Make it centered on results. For example, “Master Digital Marketing in 30 Days” tells visitors exactly what they’ll gain. Share Testimonials or Case Studies: Include quotes, videos, or screenshots from satisfied students who’ve benefited from your course. Social proof builds trust. Don't have buyers yet - get a friend of colleague on board (yes for free or at a deep discount) to gain those testimonials. Highlight Your Course Structure: Break down what’s included in easy-to-read sections like modules, lessons, and bonuses. Use bullet points or icons for a quick overview. Be Transparent with Pricing: Whether you offer one-time payments, subscriptions, or payment plans, display pricing so the buyer can make an informed decision. Include an Obvious Call-to-Action: Make your “Buy Now” button impossible to miss. Use action-oriented text like “Enroll Today” or “Start Learning Now.” Strategy B: Focus on Memorable Branding Consistent branding isn’t just about looking good. It’s about building trust and recognition. Here’s how to create a cohesive identity that sticks in your audience’s mind: Choose a Color Palette: Pick 2-3 colors that reflect your brand’s personality (calming blues for a wellness course or bold red for a business topic). Stick to these colors across your website. Pick the Right Fonts: Avoid going overboard with too many styles. Incorporate Your Logo: Place your logo prominently on the page, such as in the header or footer, to reinforce your brand identity. Use Consistent Imagery: Whether it’s photos, icons, or graphics, choose visuals that align with your brand’s vibe. If you’re teaching yoga, soft and calming images make sense. Create a Style Guide: Document your colors, fonts, and design rules so your website and marketing materials always look cohesive. Strategy C: Design for User-Friendly Navigation Even the best-looking website won’t convert if visitors get lost or frustrated. Make your website a breeze to explore: Simplify the Menu: Keep your navigation bar simple, with essential links like Home, About, Course Details, and Contact. Use Sections to Guide the Journey: Lay out your sales page with distinct sections including a welcome message, course overview, testimonials, and a pricing breakdown. Optimize for Mobile: Most users will view your site on their phones, so ensure everything looks great and functions smoothly on mobile. Add Easy Support Options: Include an FAQ section or a chat widget to answer common questions, making it easier for buyers to take the next step. DESIGN A MARKETING STRATEGY Step #2 Leverage Lead Generation Strategies Lead generation is all about drawing potential buyers into your world, sparking their interest, and giving them a taste of the value you offer. A great way to do this is by offering a lead magnet, nurturing your followers through an email sequence, and building trust with social proof. Strategy A: Create and Share Irresistible Lead Magnets A lead magnet is your way of saying, “Here’s something awesome, no strings attached (except your email).” It builds trust and starts the relationship. A strong lead magnet can generate a ton of high-quality leads. Choose a Valuable Freebie: Whether it’s an eBook...
Transcribe →
5 Ways to Help Your Friend on LinkedIn - check out the show notes
Jan 14, 202500:05:58Tap to summarizeHow to win friends and influence people on LinkedIn 🤣 Similar to Instagram or Facebook, LinkedIn is a social platform. Some folks look at it solely as a job seeking platform...and they're wrong! As a friend or colleague, you have the opportunity to support and uplift your peers on LinkedIn, helping them expand their professional reach and achieve business goals. Here are five meaningful ways you can personally contribute to their success on LinkedIn. 👉👉I'm hoping you take the time to implement all five today for a friend who needs your help. #1 Endorse Their Skills Click on their LinkedIn profile then roll down to the Skills section. It takes about five seconds to endorse them for these skills and adds credibility to their profile. Bonus if you take the time to endorse the particular skills in their CURRENT ROLE. Endorsements not only validate their abilities but also increase their visibility to potential employers or clients. #2 Write Thoughtful Recommendations A well-written recommendation can significantly boost someone's profile. If you've collaborated with your friend on a project or have insight into their work ethic and abilities, consider crafting a personalized recommendation for them. Highlight specific accomplishments and strengths to give potential connections a clear understanding of their value. You'll get a warm fuzzy writing it and your recipient friend will beam with delight when reading it. #3 Engage with Their Content When any of your friends or colleagues share content on LinkedIn, whether it's an article, a post or an achievement, show your support by engaging with it. It's easy to scroll and read but when you stop and take the time to like or comment on their post, it really amplifies their message and increases their visibility. Genuine engagement not only encourages your friends but also helps to broaden their reach. If an article or post really resonates, the highest and best helpfulness is a REPOST with thoughts. Their article will be shared with your entire network...and also gives you content to work with as you build your own LinkedIn authority. #4 Introduce Them to Your Network Similar to in-person networking, virtual networking on LinkedIn is a thing! As a friend, you can facilitate valuable connections. If you know someone who could benefit from connecting with your friend professionally, make the introduction. Personal referrals carry weight and can lead to meaningful opportunities for both parties plus you get that warm fuzzy again. Win-win. If you hear about job openings, freelance projects, or speaking engagements that align with your friends' skills and interests, consider recommending them or forwarding the opportunity directly. #5 Celebrate Their Achievements When your friends achieve milestones or receive accolades in their professional journey, take the time to celebrate with them on LinkedIn. Congratulatory messages, likes, and shares not only acknowledge their accomplishments but also demonstrate your genuine support and encouragement. See! LinkedIn really is a social platform and not just a place where you're reminded to update your profile because you're in the market for a new job. ACTION STEP 💖 Is there someone right now that you'd like to celebrate? Do it now. Are you looking for step-by-step marketing guidance on what actions to take each day? Learn More >>
Transcribe →
Kajabi SEO for Beginners - check out the show notes
Jan 7, 202500:12:55Tap to summarizeStep-by-Step How to Improve Your Website for Search without paying for pricey software or being a tech genius From a Kajabi Expert, you're about to learn how to leverage SEO to improve your Kajabi site's visibility and attract more organic traffic. It's what we all want to improve website sales - more eyeballs on our stuff! In case you didn't know already, Kajabi is a popular platform for creating and selling online courses, memberships, and other digital products. SEO, or Search Engine Optimization, is the process of improving your site's visibility on search engines like Google. Higher visibility increases the chances of attracting organic traffic. The goal is to optimize your website to rank higher in search engines for keywords that relate to your business. Step 1: Choose Keywords you want to rank for You want to be the website that comes up first in search, but have you thought about what key words or phrases you would like to be known for? The words a user types into the search bar in Google are known as keywords, usually 1-3 words. If you're first thinking you want to rank for "project management consultant" or "wedding planner", remember that you would likely be directly competing alongside companies with big bucks to spend on paid advertising. Because of their budget, they're always going to outrank you for those most searched keywords. Instead, the strategy is to be known for more specific, longer phrases of 4+ words such as "wedding planning for Texans" or "project management consultant for Agile methodologies". But...how do you know what phrases are going to work best for you? 👉TAKE ACTION: Open up Google search and begin typing keywords for your niche. Notice how Google tries to fill in the search for you, offering 4+ word phrases that others are searching for - also your opportunity to rank for these phrases. As well, you can roll further down the search page and see even more short phrases highlighted in gray ovals. Google Search: Kajabi SEO Step 2: Kajabi SEO - Landing Pages In Kajabi, navigating to Website >> Landing Pages reveals a list of pages you've created. Clicking the 3 parallel dots to the right of the webpage name reveals "Edit Details". This is where you can update the page's URL, page title and page description to enhance it's SEO. If you don’t update this information, Kajabi will use the name you gave to the page, such as “Home" or "About" which is doing nothing for your search ranking. Of course you'll want to include your keywords here. URL: using lowercase only, keep it short while briefly describing the page with hyphens to separate words (not underscores) and include a keyword if possible Page Title: include a keyword that is relevant to your page and give each page a unique title Page Description: give each page a unique description - note that this description doesn’t influence rankings, but a good description helps people decide if they want to visit your website Kajabi On-Page SEO Kajabi SEO - Website Pages The difference between a Kajabi Website Page and a Landing Pages is that landing pages are standalone, meaning you can change the header and footer and it will only affect the one page. On the other hand, updating the header or footer on a Website Page will cause all the pages in that list to update. SEO for all Website Pages are located in just one area. You'll head to the main navigation and click Settings >> Site Details then roll to the bottom of the page to find "SEO and Social Sharing". How to Improve SEO for Kajabi Website & Landing Page Content You may have created your web pages considering the aesthetics but choosing from the various font sizes using (Heading1, Heading 2, etc.) actually helps or hurts your SEO. On-page SEO Best Practices: Use just one Heading1 per page Include your main keywords in Heading1 (relevant to the page) Use no more than two Heading2 to include your 4+ keyword phrases Feel free to use an unlimited number of Heading3, Heading4, Heading5, Heading6 (to include keywords) as needed Perform a word count on the page noting that the best performing are 2,000 words or more Include the keywords in the first 200 words of the page Attempt to choose .jpg images over .png images as the first will upload faster and site speed is everything Before uploading an image to a page, consider renaming the file to describe it in a few words (key phrases), while avoiding vague file names such as "image 5" In the area for uploading any image on a page, you'll see "Image Alt Attribute" where you can add any SEO keywords that would apply to this particular photo. This can be completed with different keywords for every image on the page. If a paragraph has an internal or external link, attempt to highlight real words from the paragraph as the hyperlink (instead of "click here") When designing navigation or linking to another Kajabi page, better SEO is gained by using the full URL (http://www.website/landingpage) of the page rather than the shortcut of "/landingpage" Heading1, Heading2, Heading3 - Kajabi SEO Step 3: Kajabi SEO - Mobile View At the top of any Kajabi webpage is an option to view on desktop or mobile. Take a look at the mobile version for every single page. If any text or images are cut off, that really needs to be improved to be considered "a good website" for Google standards. Step 4: Kajabi Blogging for SEO With the emergence of Chat GPT and other LLMs, there's no excuse for not having a weekly blog at minimum. The more words on your website, the more Google has to work with. They would be more likely to offer your website in search if a blog post contained exactly the keywords your audience would likely type into search. If your website has a simple home page, sales page, and no blog, it is not ...
Transcribe →
The Art of Designing a Monthly Membership Model (Step-by-Step): check out the show notes
Jan 1, 202500:20:13Tap to summarizeFocus on strategic growth instead of constantly chasing the next client. Clients who invest in a recurring membership aren't just customers. They're committed partners in their own success. For you, it means higher retention and lifetime customer value. With a membership model, you can offer exclusive content, personalized support, and a thriving community of people who are supportive of one another. You're not just delivering a service, you're creating an ecosystem where your clients feel deeply connected and engaged. It's the ultimate leverage, turning your expertise into a powerhouse of recurring revenue and lasting impact. Building this new model requires shifting from a transactional approach into building a scalable, loyal enterprise. But, how do you go about designing a membership? Read on... Step 1: Define Your Audience Start by identifying the demographic and psychographic characteristics of your ideal members. Consider age, gender, occupation, interests, and pain points. Their behaviors, preferences, and motivations will drive decision-making. WHO will be invited to be a part of your membership... #1 Hobbyists Your audience has the common interest of a shared hobby. This type of community will have people coming and going, often due to their own time constraints and interest in the subject matter. #2 Business Owners An audience of business owners, on the other hand, have a drive to make more money as their side business or main business. As long as they are implementing your strategies and their business is growing, they will likely maintain in your membership. If you're currently offering a hobbyist community, could you also help those hobbyists become business owners in this niche? Step 2: Clarify Your Membership’s Purpose and Focus Identify the core objectives of your membership. What problems are you solving? This involves understanding the unique needs and aspirations of your target audience and aligning your membership benefits to fit them. Clarifying the mission and goals of your membership helps ensure that your membership offerings are aligned. Which of the following fits your membership... a. Entertainment b. Community c. Mastering a Skill Step 3: Determine Your Role and Responsibilities As a leader, your primary responsibility is to set the vision and direction for the membership. Your role involves strategic planning, content creation, and engagement with the community as well as delivering value through exclusive content, resources, and events. Additionally, you'll have administrative tasks such as managing subscriptions, tracking metrics, and analyzing feedback for improvement. Which of the following describes your role in the membership... a. Subject authority or teacher b. Facilitator of bringing in guest authorities c. Community leader over group discussions d. Coach or therapist Step 4: Choose Your Membership Style Each membership style offers unique benefits and caters to different audience needs. For instance, a tiered membership can provide various levels of access and benefits. An all-inclusive membership might attract those looking for all encompassing value. A content-specific model could cater to niche interests or specialized expertise. Consider what aligns best with your business goals and the preferences of your target audience. Think about the type of content and resources you can consistently provide to maintain engagement. a. Regular Content Publications: This would be similar to a monthly magazine subscription, but instead could take the form of a monthly paid podcast, video, blog or PDF packed within current information. b. Mailed Box: Each month, a package arrives full of tangible products, all with a central theme. c. Group Coaching: Once monthly or bimonthly group coaching is over Zoom during which you either present new information or coach individuals in a hot seat format. d. Community: Connect like-minded people into one group for discussion, either as an ongoing chat model or weekly/monthly meetup, creating a bonded gathering. e. Drip Content: Evergreen content works well if dripped one stage at a time, from beginner content to more advanced as the member grows into what they need to move along in their journey. Step 5: Inclusive or Exclusive? Despite today's movement of inclusivity, a private membership is exclusive by definition. You've designed your membership for a particular audience with a similar interest, problem to solve, or demographic. Those not fitting the membership requirements are not invited to join. That said, it helps your member retention if you're able to specifically define the purpose of the community. How will they become different (or undergo a mini transformation) from the moment the join? What will they be left feeling that was not the case prior to joining? Give your community a name that defines the group. Give it a single rule that defines the group. Is there a NEED for this type of group? Is there a DESIRE for this type of group? You're creating a space for others to connect inside a private community. Their transformation begins once they feel they've found "their people" because you've defined the purpose of the group. </...
Transcribe →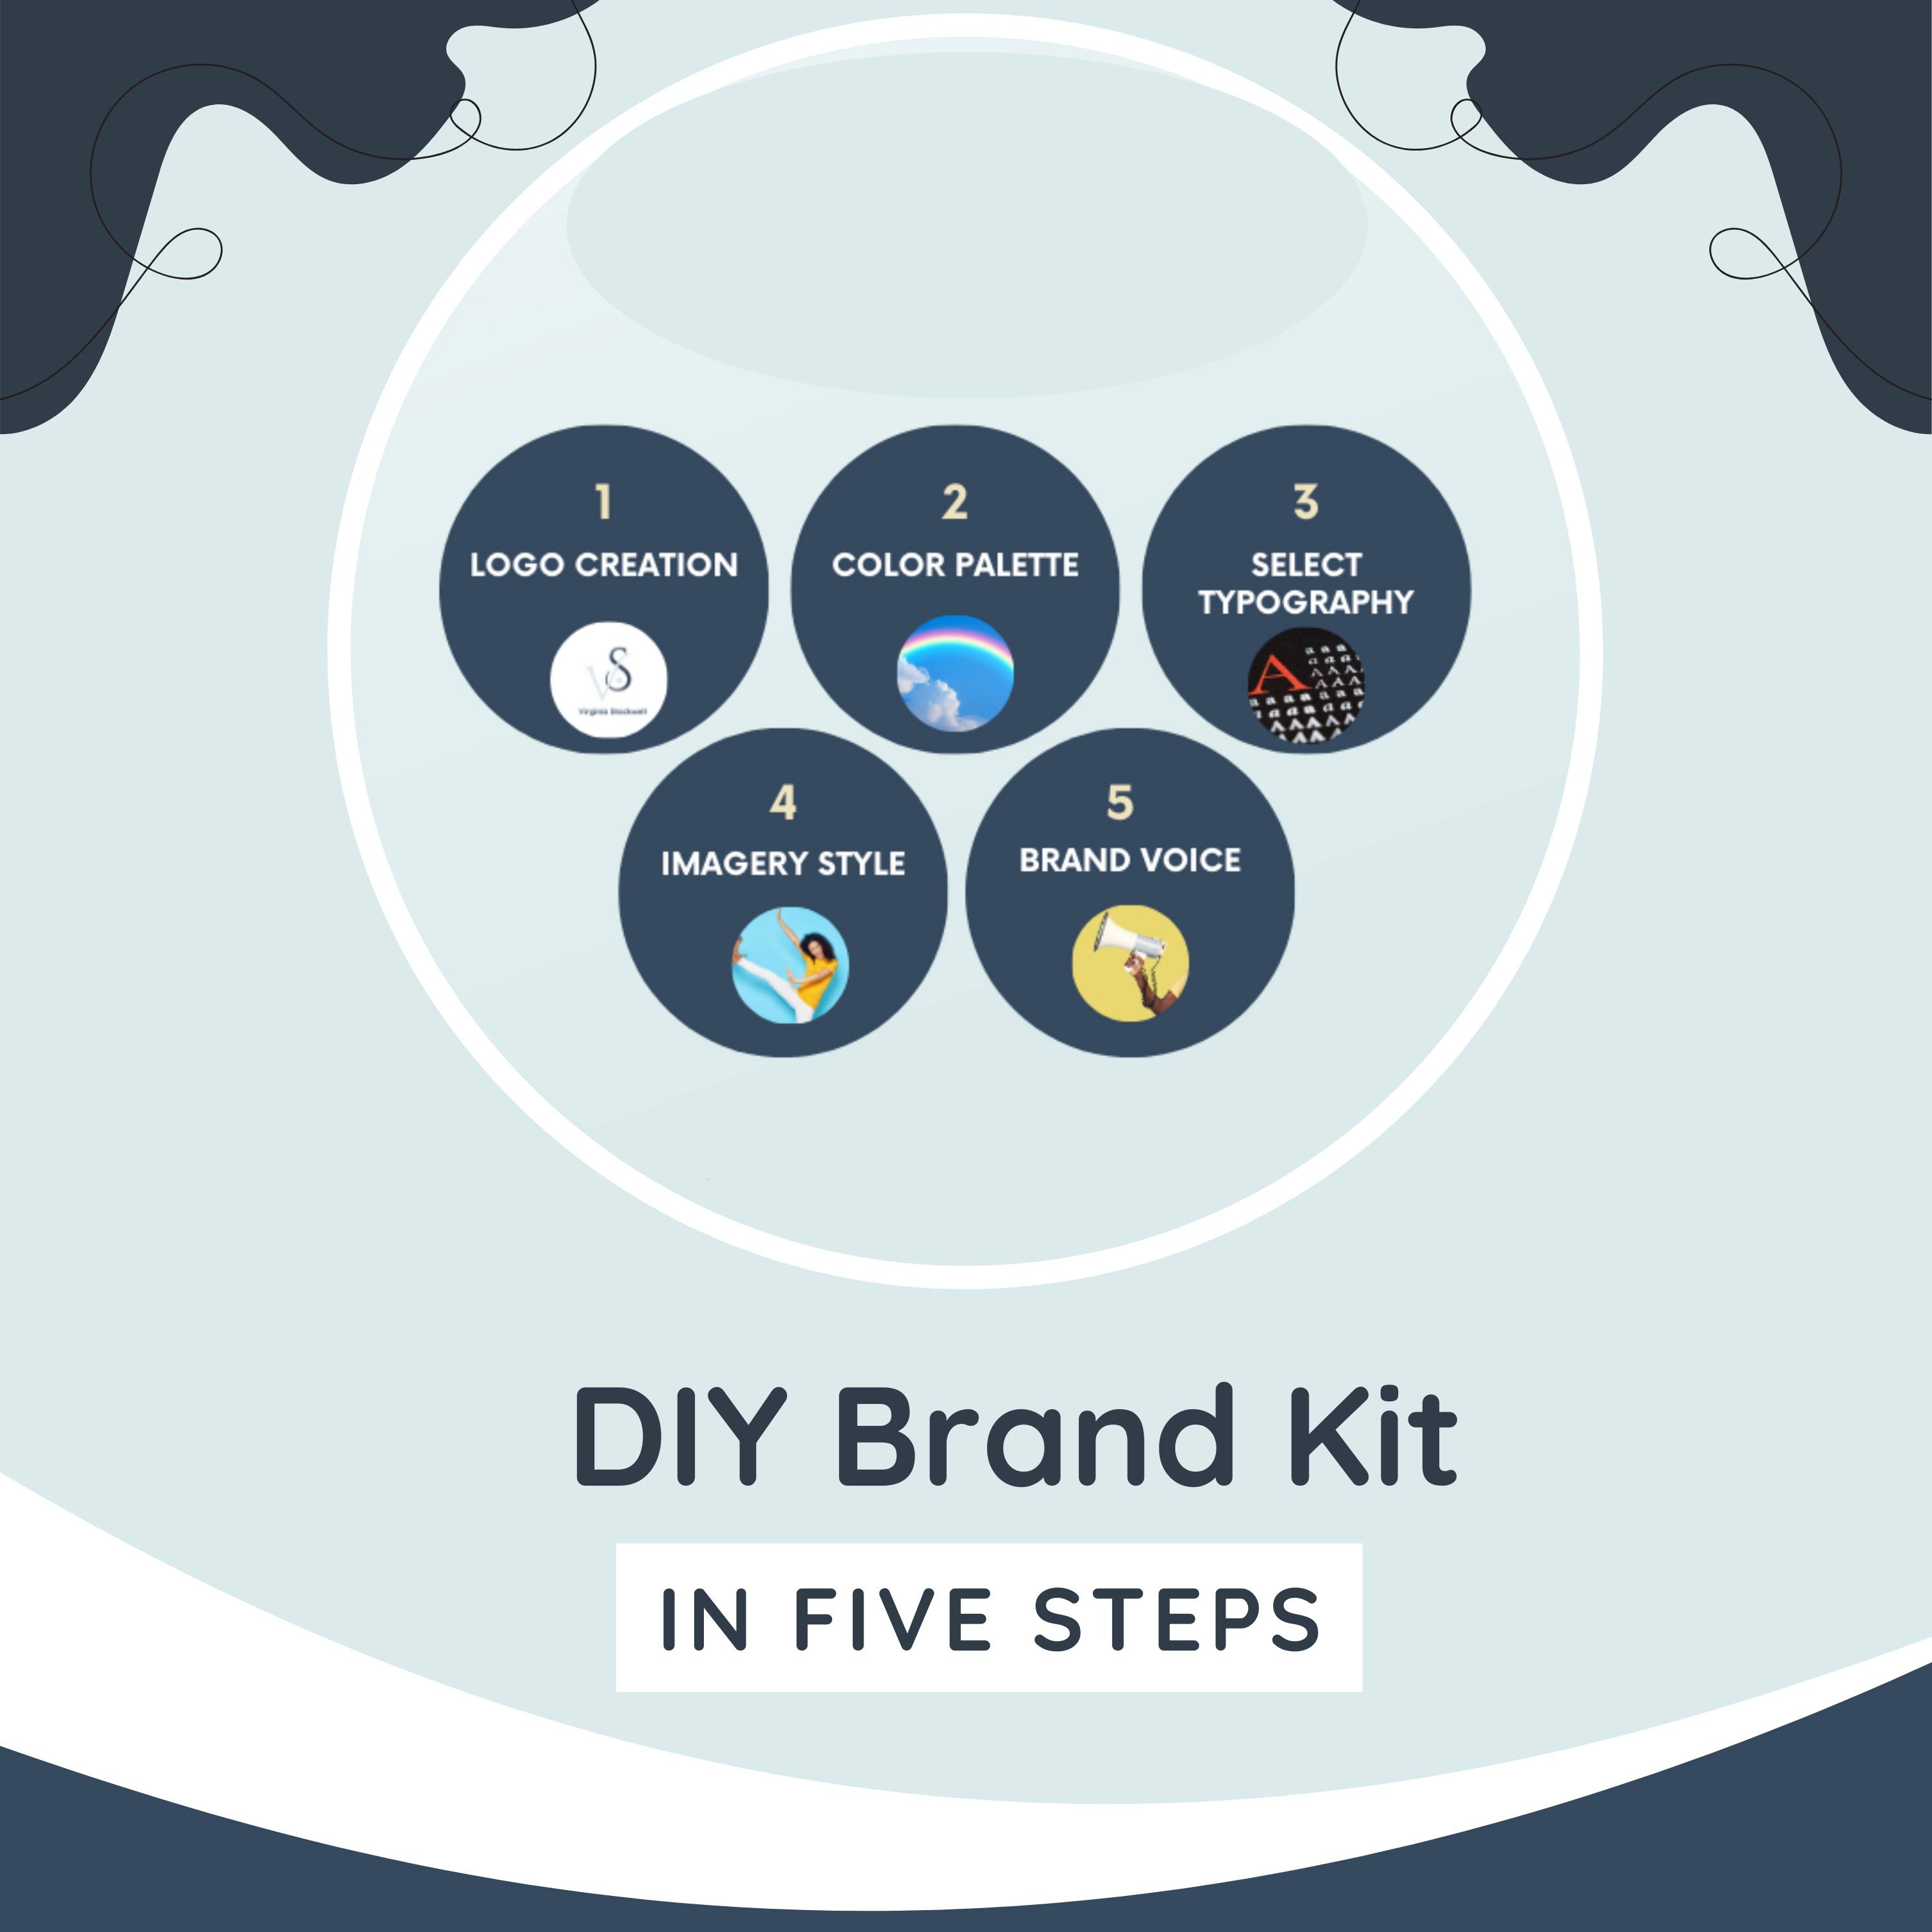
How to DIY a Brand Kit in 5 Steps: check out the show notes
Dec 25, 202400:15:11Tap to summarizeHave you designed a brand kit before? A brand kit is like your brand’s cheat sheet. It’s a collection of visual guidelines that bring your company’s personality to life. It's your go-to reference for keeping your website, social media, emails, and presentations on the same stylish page. Why do you need one? Consistency is key! When your brand looks the same everywhere, it builds recognition and trust. People start to associate those colors, fonts, and vibes with you. Plus, it saves you tons of time because you’re not reinventing the wheel every time you design something. 💗Because your business deserves to look as good as it is. Brand Kits usually include: Logo: as a JPG or PNG with white, black, and transparent backgrounds Color Palette: hex codes Typography: heading and body text Imagery Style: guidelines for the types of images that align with your vibe Brand Voice: guidelines for the tone and style of your written content When you're just starting out, your business and brand are still evolving and creating a DIY brand kit is the perfect way to play around with different brand personality ideas. Performing a little DIY will allow you to experiment with colors, fonts, and visuals that connect with your vision. That brand kit can grow alongside your business, evolving as your style and audience become more defined. Step-by-Step DIY Brand Kit #1 Logo Creation The most memorable logos are simple and adaptable, avoiding complex shapes or intricate details. Geometric shapes (like circles or squares) convey professionalism, while free-form shapes feel more unique. Decide if your logo will be primarily text-based (just your brand name in a stylized font) or if it will include an icon or symbol. It’s a good idea to work with black and white first so you can focus on the form without being influenced by color. Intricate details can get lost or become blurry at smaller scales. #2 Color Palette Select 3 to 5 core colors that reflect your brand’s personality. Hex codes are essential for digital consistency. Note which colors will be primary, secondary, and accent to create a hierarchy of use. Think about the emotions you want to evoke as each color can subtly influence brand perception. Ensure color contrasts are strong enough for readability, but not too bright. #3 Select Typography Choose one font for headings and another complementary one for body text. Kajabi has about 50 to choose from (without needing custom coding). Avoid overly decorative or script fonts that might compromise readability. Match your typography style to your brand's tone. Sans-serif fonts often convey modernity and simplicity while serif fonts evoke tradition and elegance. #4 Imagery Style Decide on the emotion you want your images to convey (vibrant and energetic, calm and neutral, minimalistic...). Outline the type of images you’ll use (lifestyle shots, product images, abstract). If you prefer a particular filter, level of saturation, or contrast, add that to the brand kit to maintain visual consistency. #5 Brand Voice Are you friendly and conversational, formal and professional, or inspirational? Note any preferred language nuances, phrases, or terms that align with your voice (for example, if you’re conversational, you might avoid formal jargon). Describe the feeling you want to leave with your audience (motivated, informed, supported) and create a few sample sentences to guide your content strategy. 👉If you like step-by-step content like this, you're going to love the program Small Steps, Big Results Learn More >> Look for me again next Tuesday. Be sure and check out more article links below 😲😲 Best wishes and much success to you, Virginia Stockwell, Business Coach & Kajabi Expert Work with Virginia
Transcribe →